> ## Documentation Index
> Fetch the complete documentation index at: https://docs.adopt.ai/llms.txt
> Use this file to discover all available pages before exploring further.
# Creating an agent
> How to create an agent, what naming it does behind the scenes, and the fields that matter.
An Agent is the thing that prepares the work. You either create one directly (Advanced) or get one automatically by choosing a task template (Quick). This page covers the direct route and the guided builder.
 ## The six-step builder
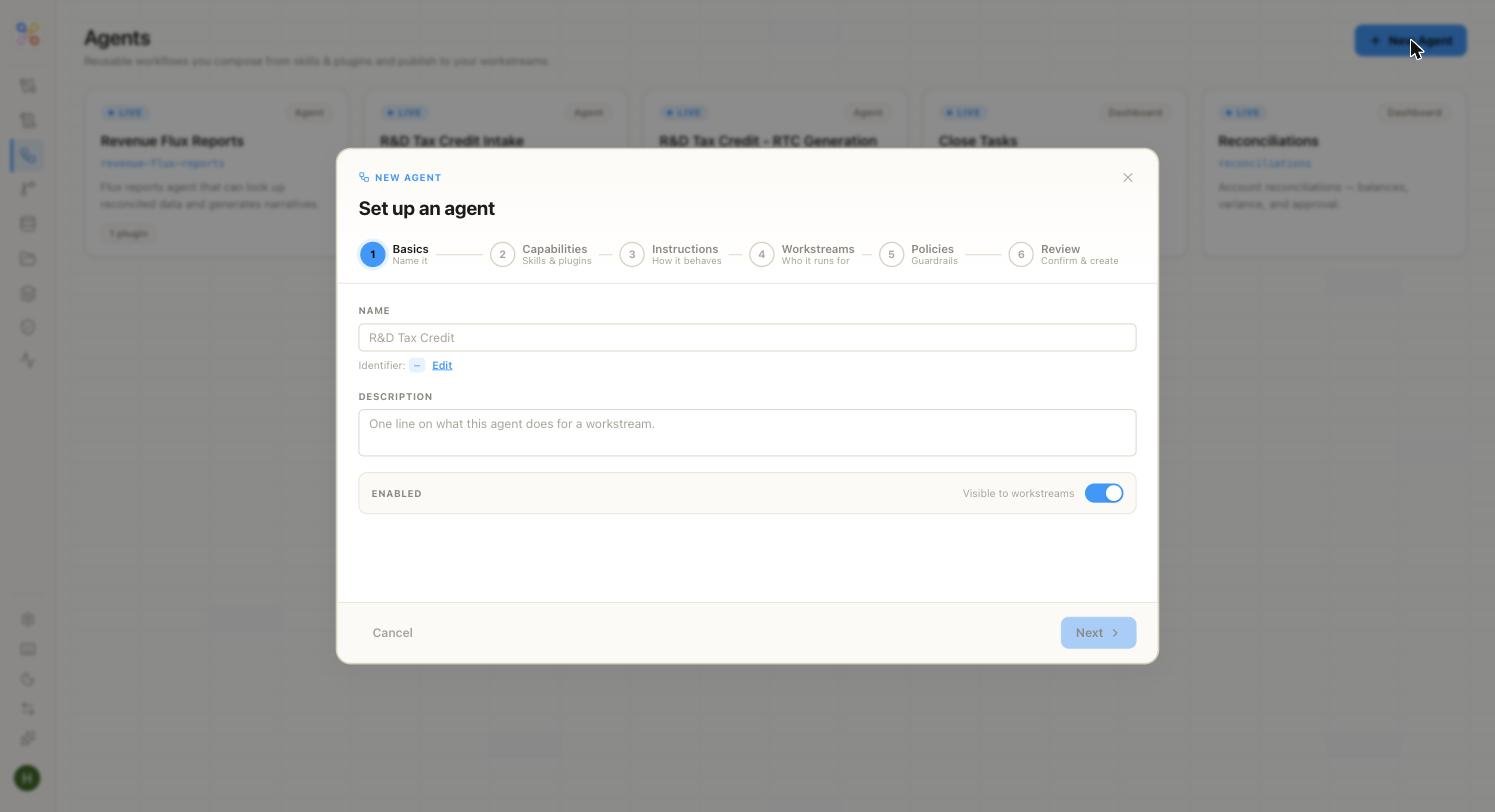
Creating an agent walks through six steps — the same shape whether you're starting fresh or refining a template's agent.
Give the agent a **name** (e.g. "R\&D Tax Credit") and a **description** of what it does for a workstream. The name generates a fixed **identifier** (e.g. `r_d_tax_credit`) that **can't change after creation**, so choose it deliberately. An **Enabled** toggle controls whether it's visible to workstreams.
Pick the **skills and plugins** this agent may use — Read documents, Query Data Store, Generate workpaper, Web search, Tax Forms, and so on. Turn on only what the work needs; a skill grants capability, not access. See [Instructions and skills](/builder-guide/instructions-and-skills).
Write plain-language direction for how the agent should behave and sequence its work — the glue logic. Be specific about the output you want and any standards to follow.
Choose which **workstreams (clients)** this agent runs for. Agents bind to their workstreams here, at build time.
Set the **guardrails** — the constraints the agent must operate within (for example, where human review is required). This is where review and escalation behaviour is shaped.
Confirm the configuration and create the agent.
## What naming an agent does
Creating an agent silently provisions a **Space** — an isolated bucket for that agent's data. You don't manage the Space directly; you work in terms of the agent. It's simply why the agent's working data stays separate from everything else. See [Agents, Spaces, and Skills](/core-concepts/agents-spaces-skills).
## Enabling and testing
The **Enabled** toggle controls whether workstreams can see and use the agent. A common pattern is to leave it disabled, [test it](/builder-guide/testing-an-agent) on a client with real files, and enable it only once the output looks right.
A created agent isn't useful until it has instructions and skills, **access to data** (a skill alone doesn't grant it — see [Setting Doc Store access](/builder-guide/doc-store-access)), and a successful test run.
## Next steps
1. [Instructions and skills](/builder-guide/instructions-and-skills)
2. [Setting Doc Store access](/builder-guide/doc-store-access)
3. [Testing an agent](/builder-guide/testing-an-agent) → [Schedule and publish](/builder-guide/schedule-and-publish)
## The six-step builder
Creating an agent walks through six steps — the same shape whether you're starting fresh or refining a template's agent.
Give the agent a **name** (e.g. "R\&D Tax Credit") and a **description** of what it does for a workstream. The name generates a fixed **identifier** (e.g. `r_d_tax_credit`) that **can't change after creation**, so choose it deliberately. An **Enabled** toggle controls whether it's visible to workstreams.
Pick the **skills and plugins** this agent may use — Read documents, Query Data Store, Generate workpaper, Web search, Tax Forms, and so on. Turn on only what the work needs; a skill grants capability, not access. See [Instructions and skills](/builder-guide/instructions-and-skills).
Write plain-language direction for how the agent should behave and sequence its work — the glue logic. Be specific about the output you want and any standards to follow.
Choose which **workstreams (clients)** this agent runs for. Agents bind to their workstreams here, at build time.
Set the **guardrails** — the constraints the agent must operate within (for example, where human review is required). This is where review and escalation behaviour is shaped.
Confirm the configuration and create the agent.
## What naming an agent does
Creating an agent silently provisions a **Space** — an isolated bucket for that agent's data. You don't manage the Space directly; you work in terms of the agent. It's simply why the agent's working data stays separate from everything else. See [Agents, Spaces, and Skills](/core-concepts/agents-spaces-skills).
## Enabling and testing
The **Enabled** toggle controls whether workstreams can see and use the agent. A common pattern is to leave it disabled, [test it](/builder-guide/testing-an-agent) on a client with real files, and enable it only once the output looks right.
A created agent isn't useful until it has instructions and skills, **access to data** (a skill alone doesn't grant it — see [Setting Doc Store access](/builder-guide/doc-store-access)), and a successful test run.
## Next steps
1. [Instructions and skills](/builder-guide/instructions-and-skills)
2. [Setting Doc Store access](/builder-guide/doc-store-access)
3. [Testing an agent](/builder-guide/testing-an-agent) → [Schedule and publish](/builder-guide/schedule-and-publish)