Editing Steps in an Action
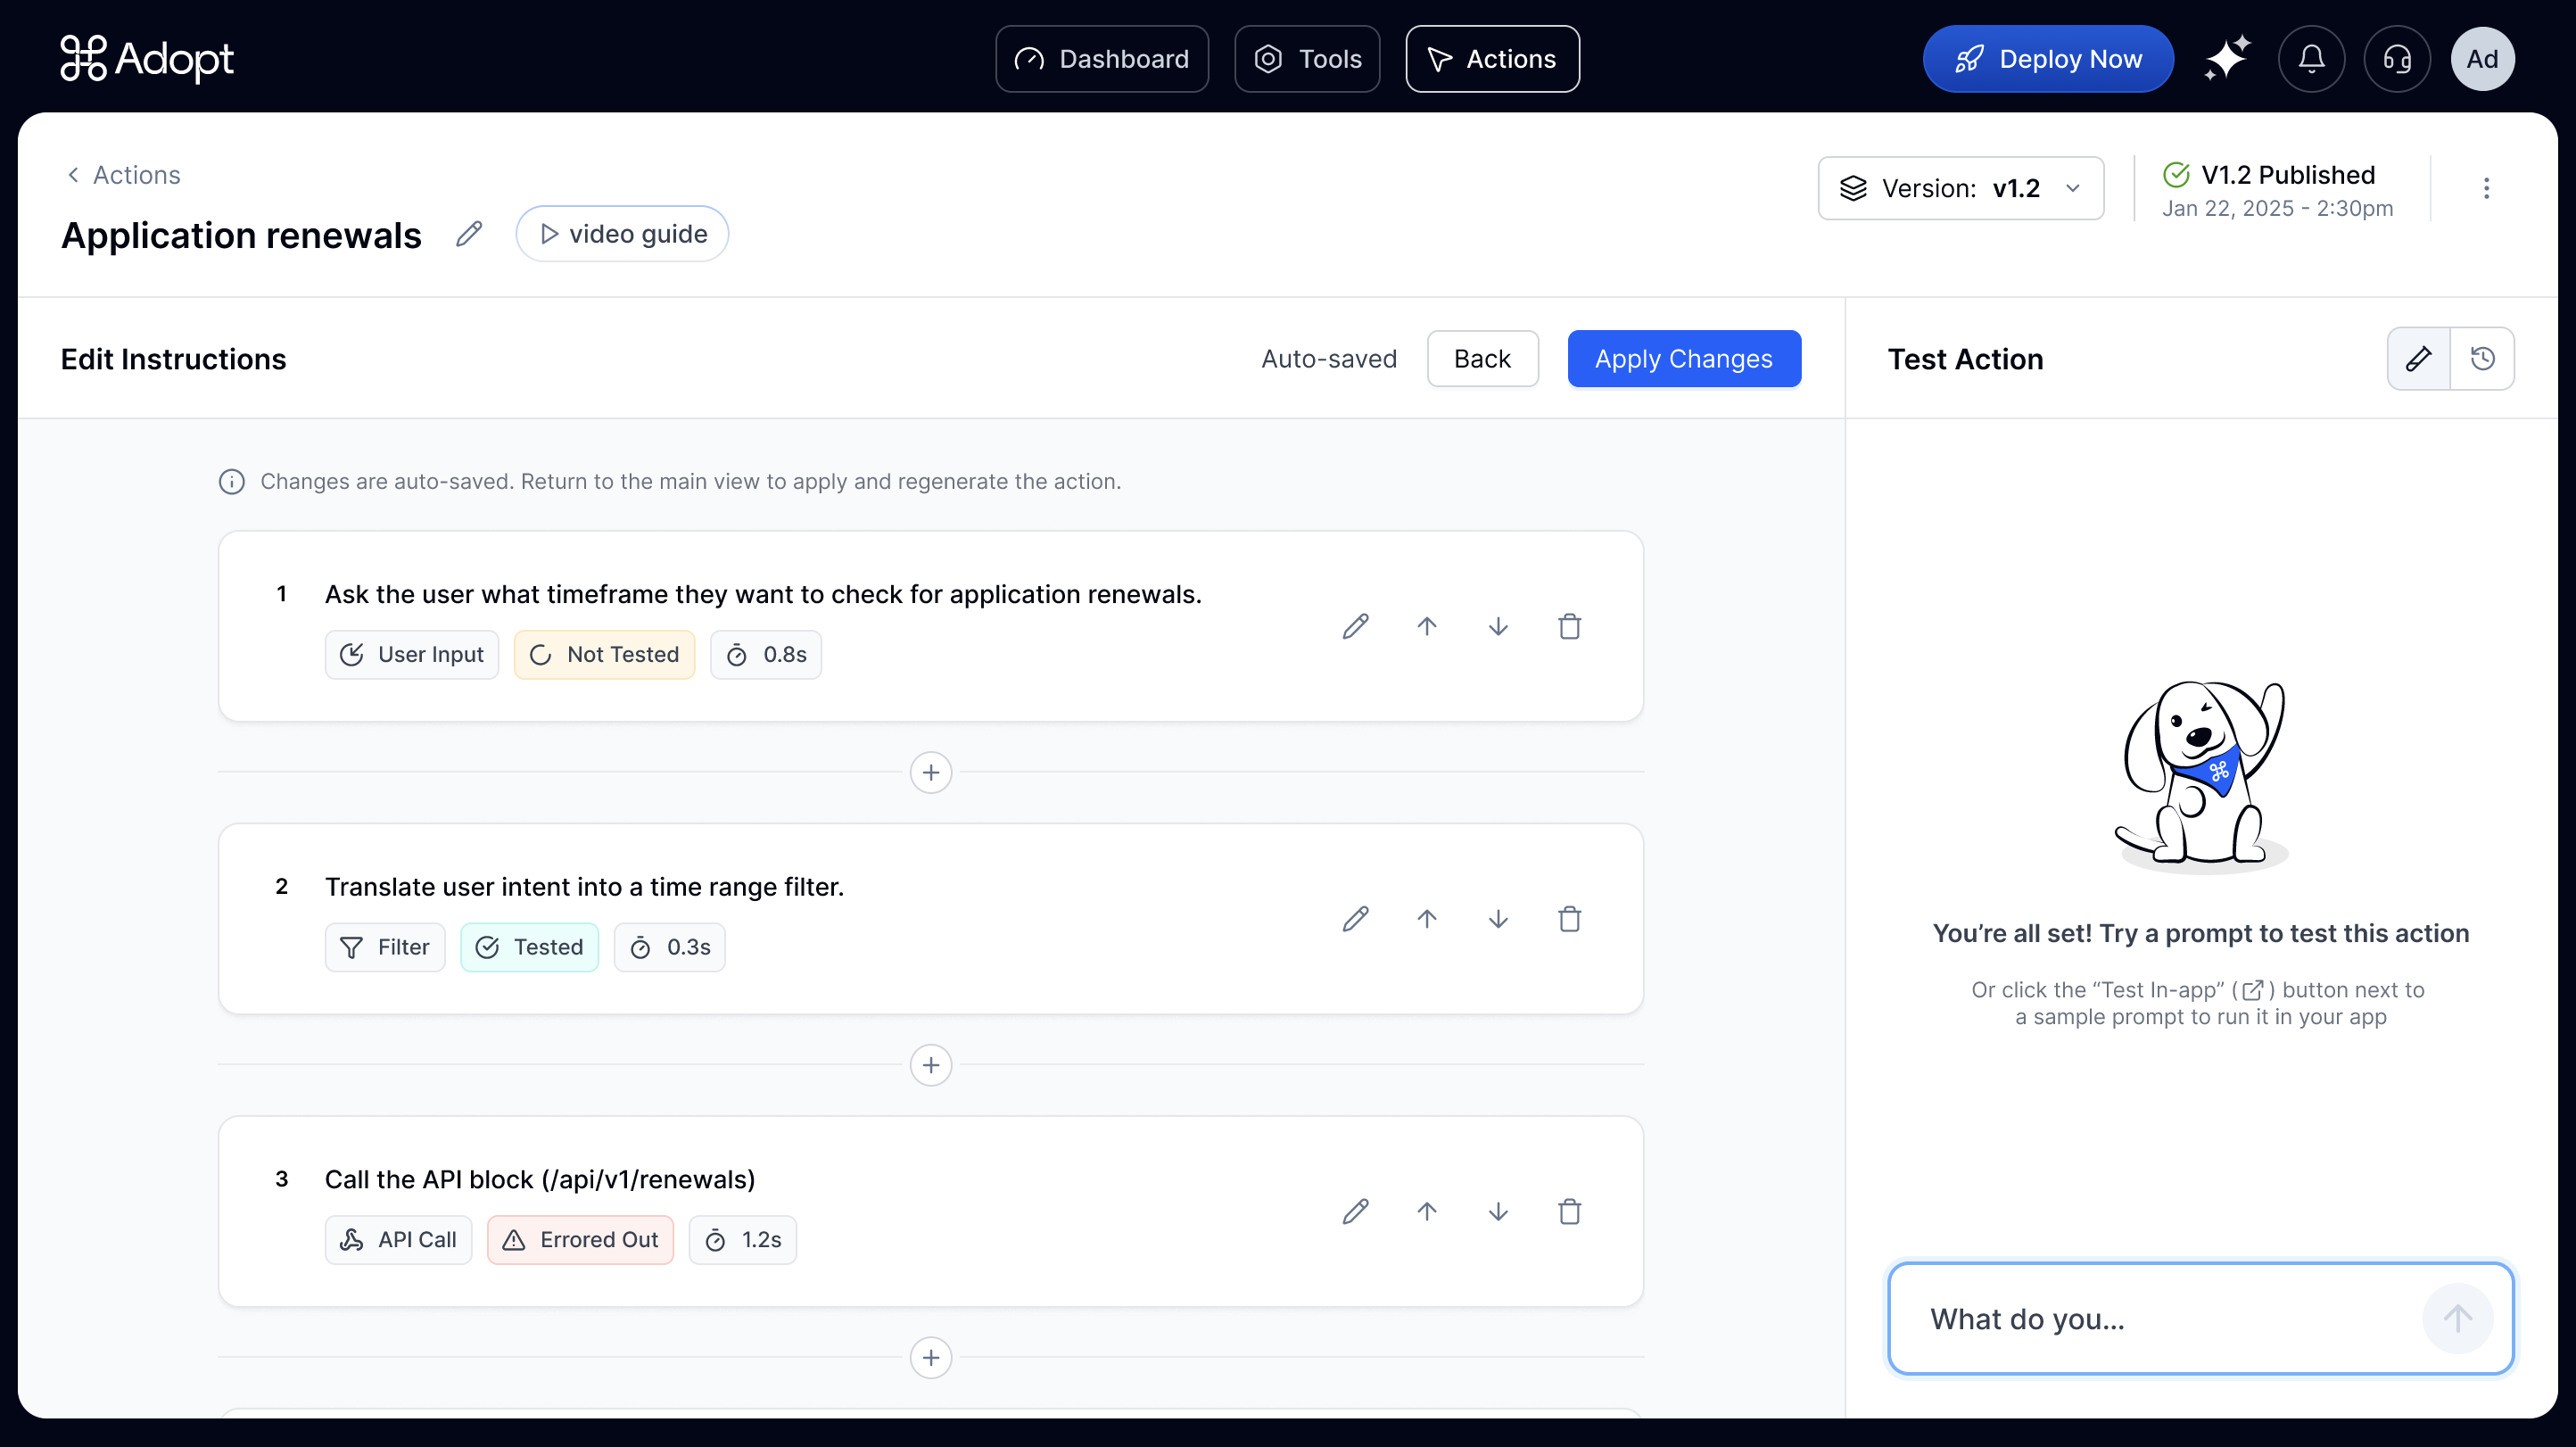 Every Action is made up of a set of instruction steps—these define the logic your agent will follow when the Action is triggered.
You can edit, delete, or add new steps to any Action. This gives you full control over how the agent behaves.
Every Action is made up of a set of instruction steps—these define the logic your agent will follow when the Action is triggered.
You can edit, delete, or add new steps to any Action. This gives you full control over how the agent behaves.
Select Step Type
When editing a step, the first thing you’ll select is the Step Type. Adopt supports six core step types: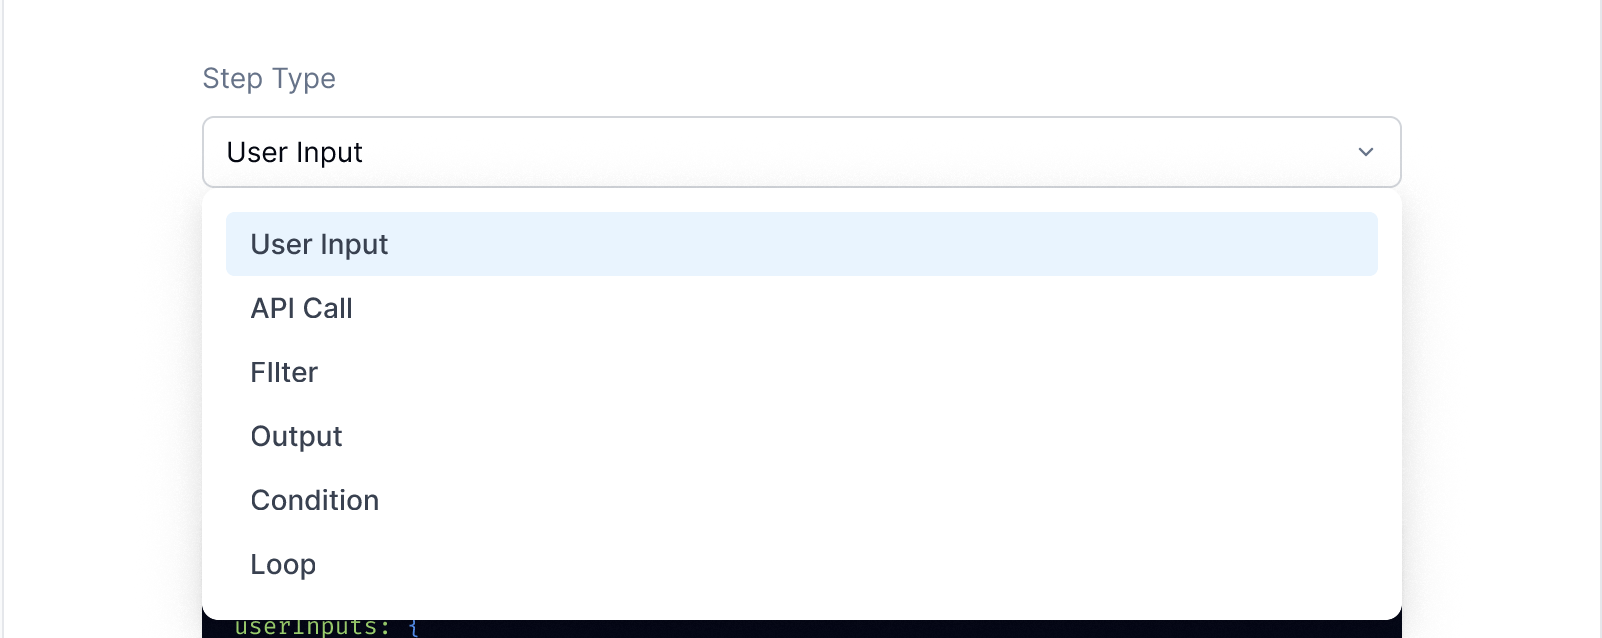
- User Input – Asks the user for specific information (e.g., “What timeframe do you want to check?”).
- API Call – Calls an external API using configured inputs.
- Filter – Filters a dataset or response (e.g., show only active users).
- Output – Displays a message or result back to the user.
- Condition – Adds branching logic (e.g., if-else based on user input or API response).
- Loop – Repeats a block of steps for each item in a list.
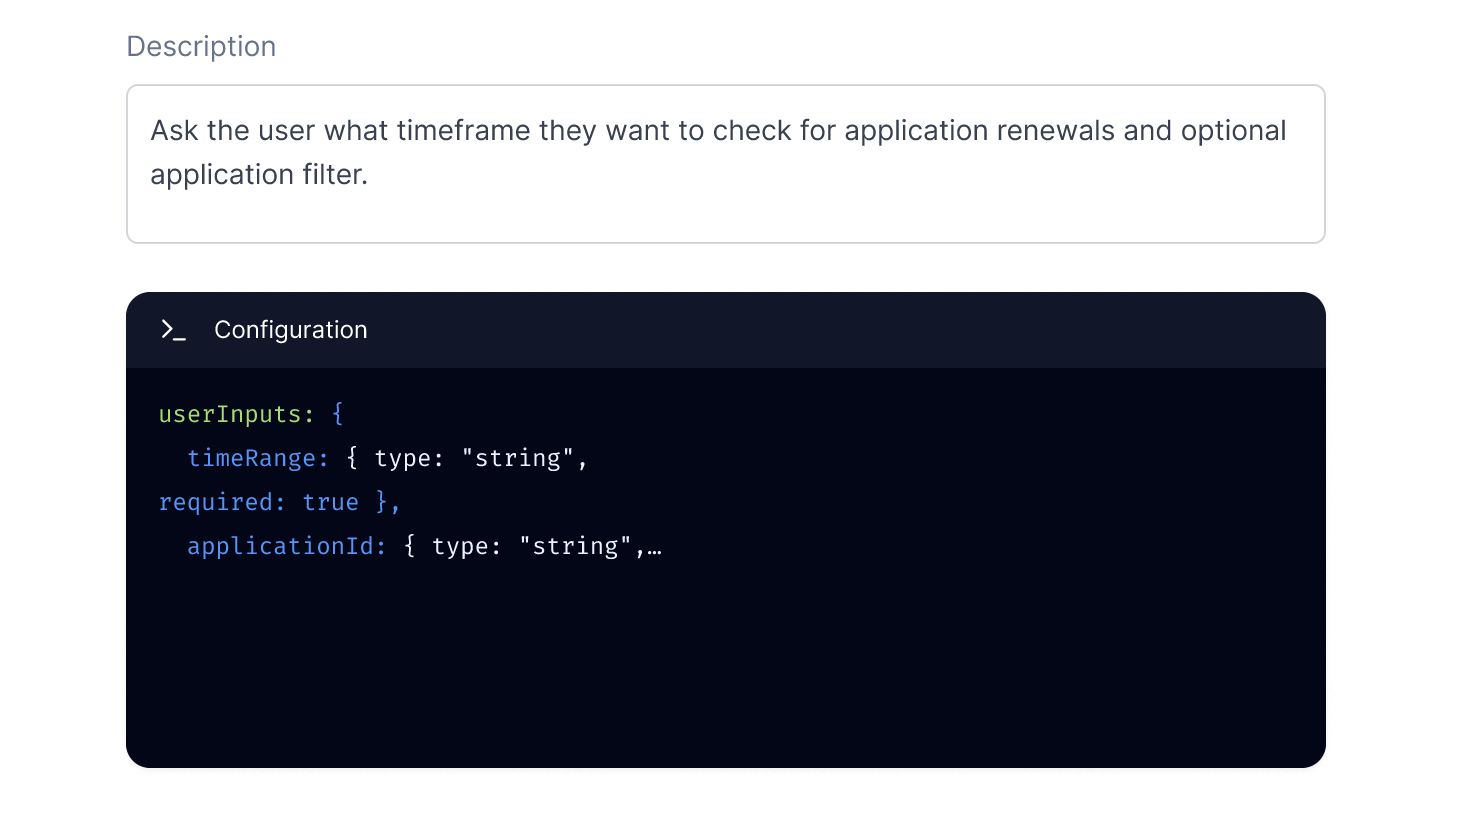
Add Step Description
After selecting the Step Type, you’ll add a natural language description of what the step should do. This helps our AI generate the corresponding JSON logic that powers the agent’s execution under the hood.Manually Configure Step JSON
You can also manually edit the JSON if you need to fine-tune anything.The step’s JSON logic is auto-generated based on the Step Type and description you provide — no manual editing required.
But if you want more control, you can open the JSON editor and fine-tune it directly.
But if you want more control, you can open the JSON editor and fine-tune it directly.
 Once you’re happy with the step, click Apply to save your changes and update the Action.
Next, you can learn more about how to Test Actions once created right from within the Agent Builder Platform.
Once you’re happy with the step, click Apply to save your changes and update the Action.
Next, you can learn more about how to Test Actions once created right from within the Agent Builder Platform.