- Step 1 - Click the
+ New Actionbutton in the top-right corner of the Actions tab. - Step 2 - Add Action Name
- Step 3 - Define how this Action works
Fill in the Action Name
 After clicking the
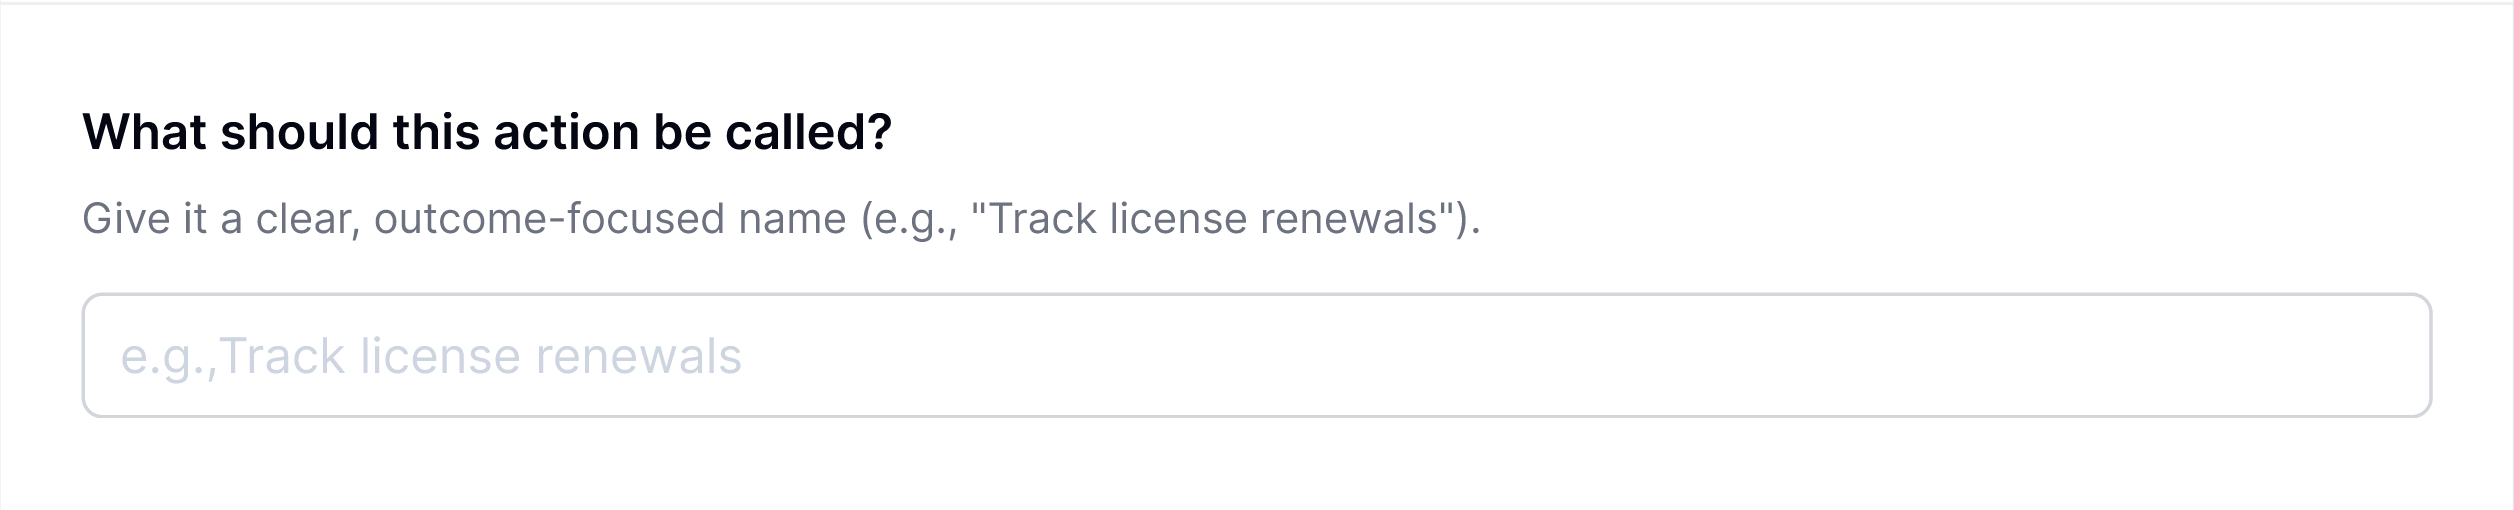
 + New Action button, you’ll be asked to fill in the Action Name.This is what you want to call the action. We recommend starting with a verb so it’s immediately clear what it does.
Examples:
Track license renewalsUpdate user permissionsCancel unassigned licenses
Define How this Action works
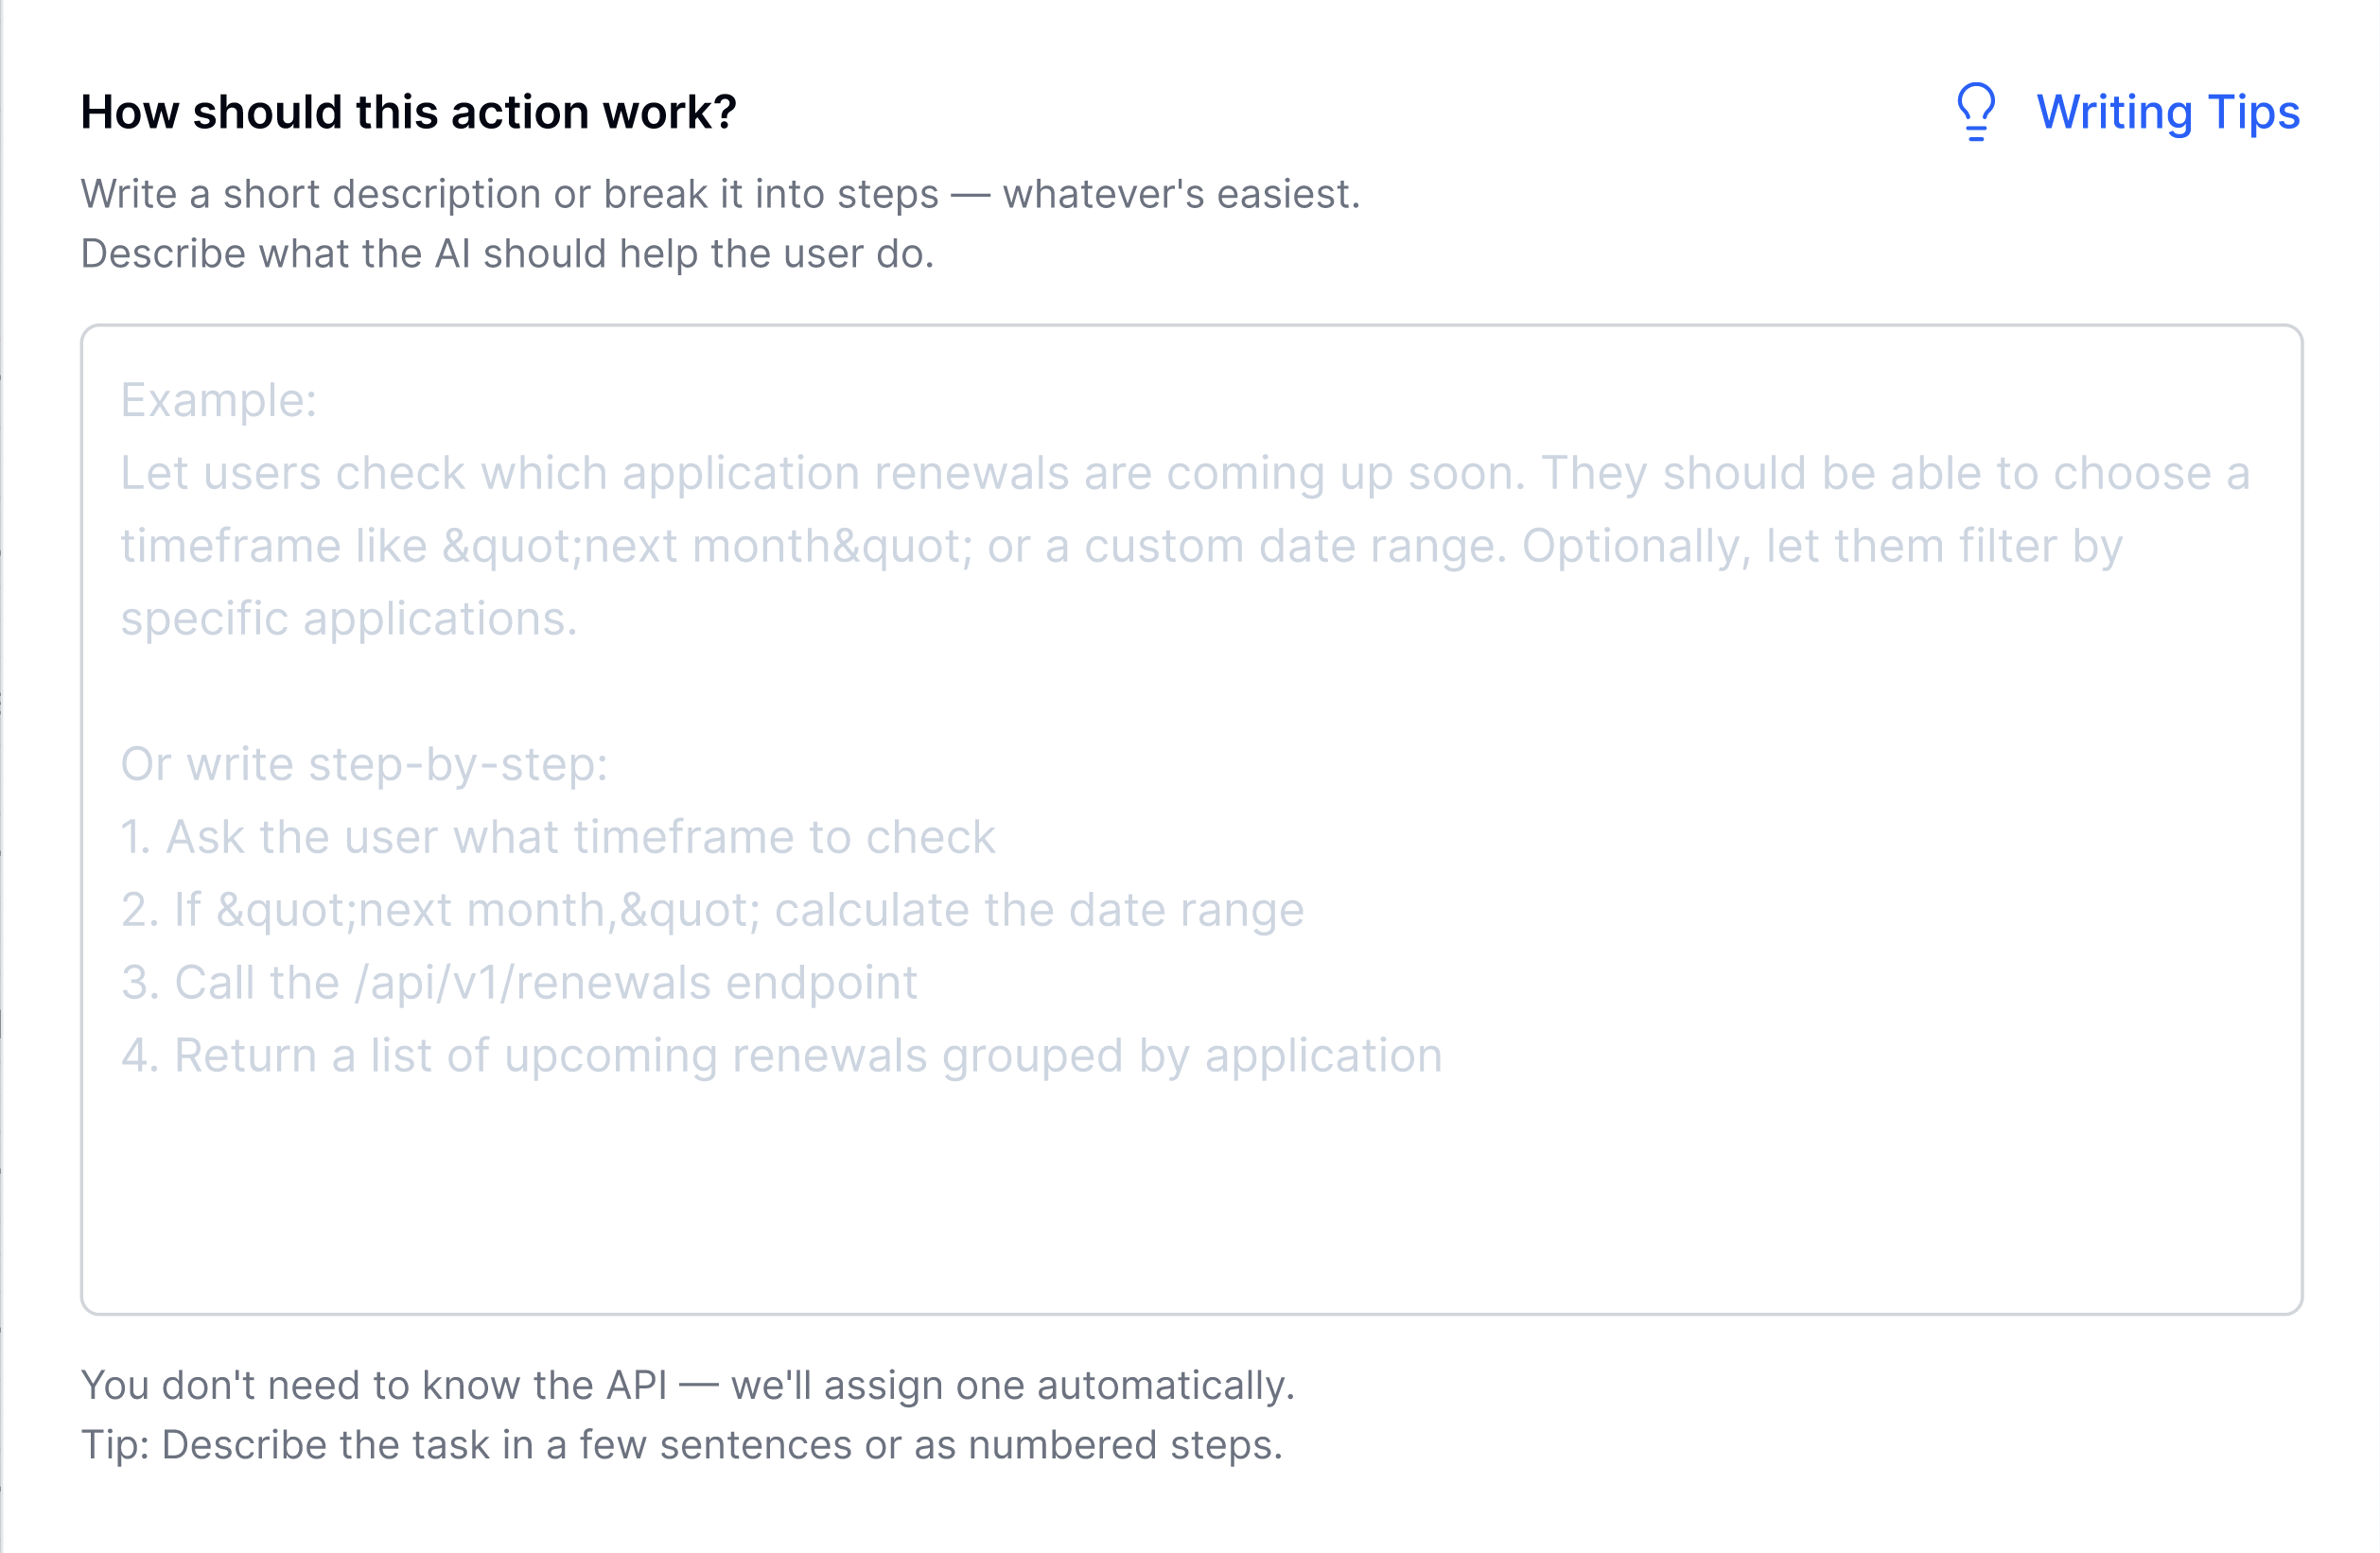 This is the important bit. Here, you’ll describe what the action should do—either as a short paragraph or a list of steps.
Here’s an example of a good prompt →
Let’s say you want to track license renewals in a spend management application. A strong prompt might look like this:
This is the important bit. Here, you’ll describe what the action should do—either as a short paragraph or a list of steps.
Here’s an example of a good prompt →
Let’s say you want to track license renewals in a spend management application. A strong prompt might look like this:
Let users check which application renewals are coming up soon. They should be able to choose a timeframe like “next month” or a custom date range. Optionally, let them filter by specific applications. Step-by-step:
- Ask the user what timeframe to check
- If “next month,” calculate the date range
- Return a list of upcoming renewals grouped by application
Get Live Feedback as You Type
 As you fill in the “How this action works” field, you’ll see real-time suggestions below it.
This feedback helps improve your input so the LLM understands the task better—and builds the most accurate version of the Action.
As you fill in the “How this action works” field, you’ll see real-time suggestions below it.
This feedback helps improve your input so the LLM understands the task better—and builds the most accurate version of the Action.
Submit Action
 Click
Click Create Actionto save your new action.
Once submitted, it’ll take about 10–15 seconds for our AI to process your input, understand the intent, and generate the action logic behind the scenes.
Inside the Action Details Page
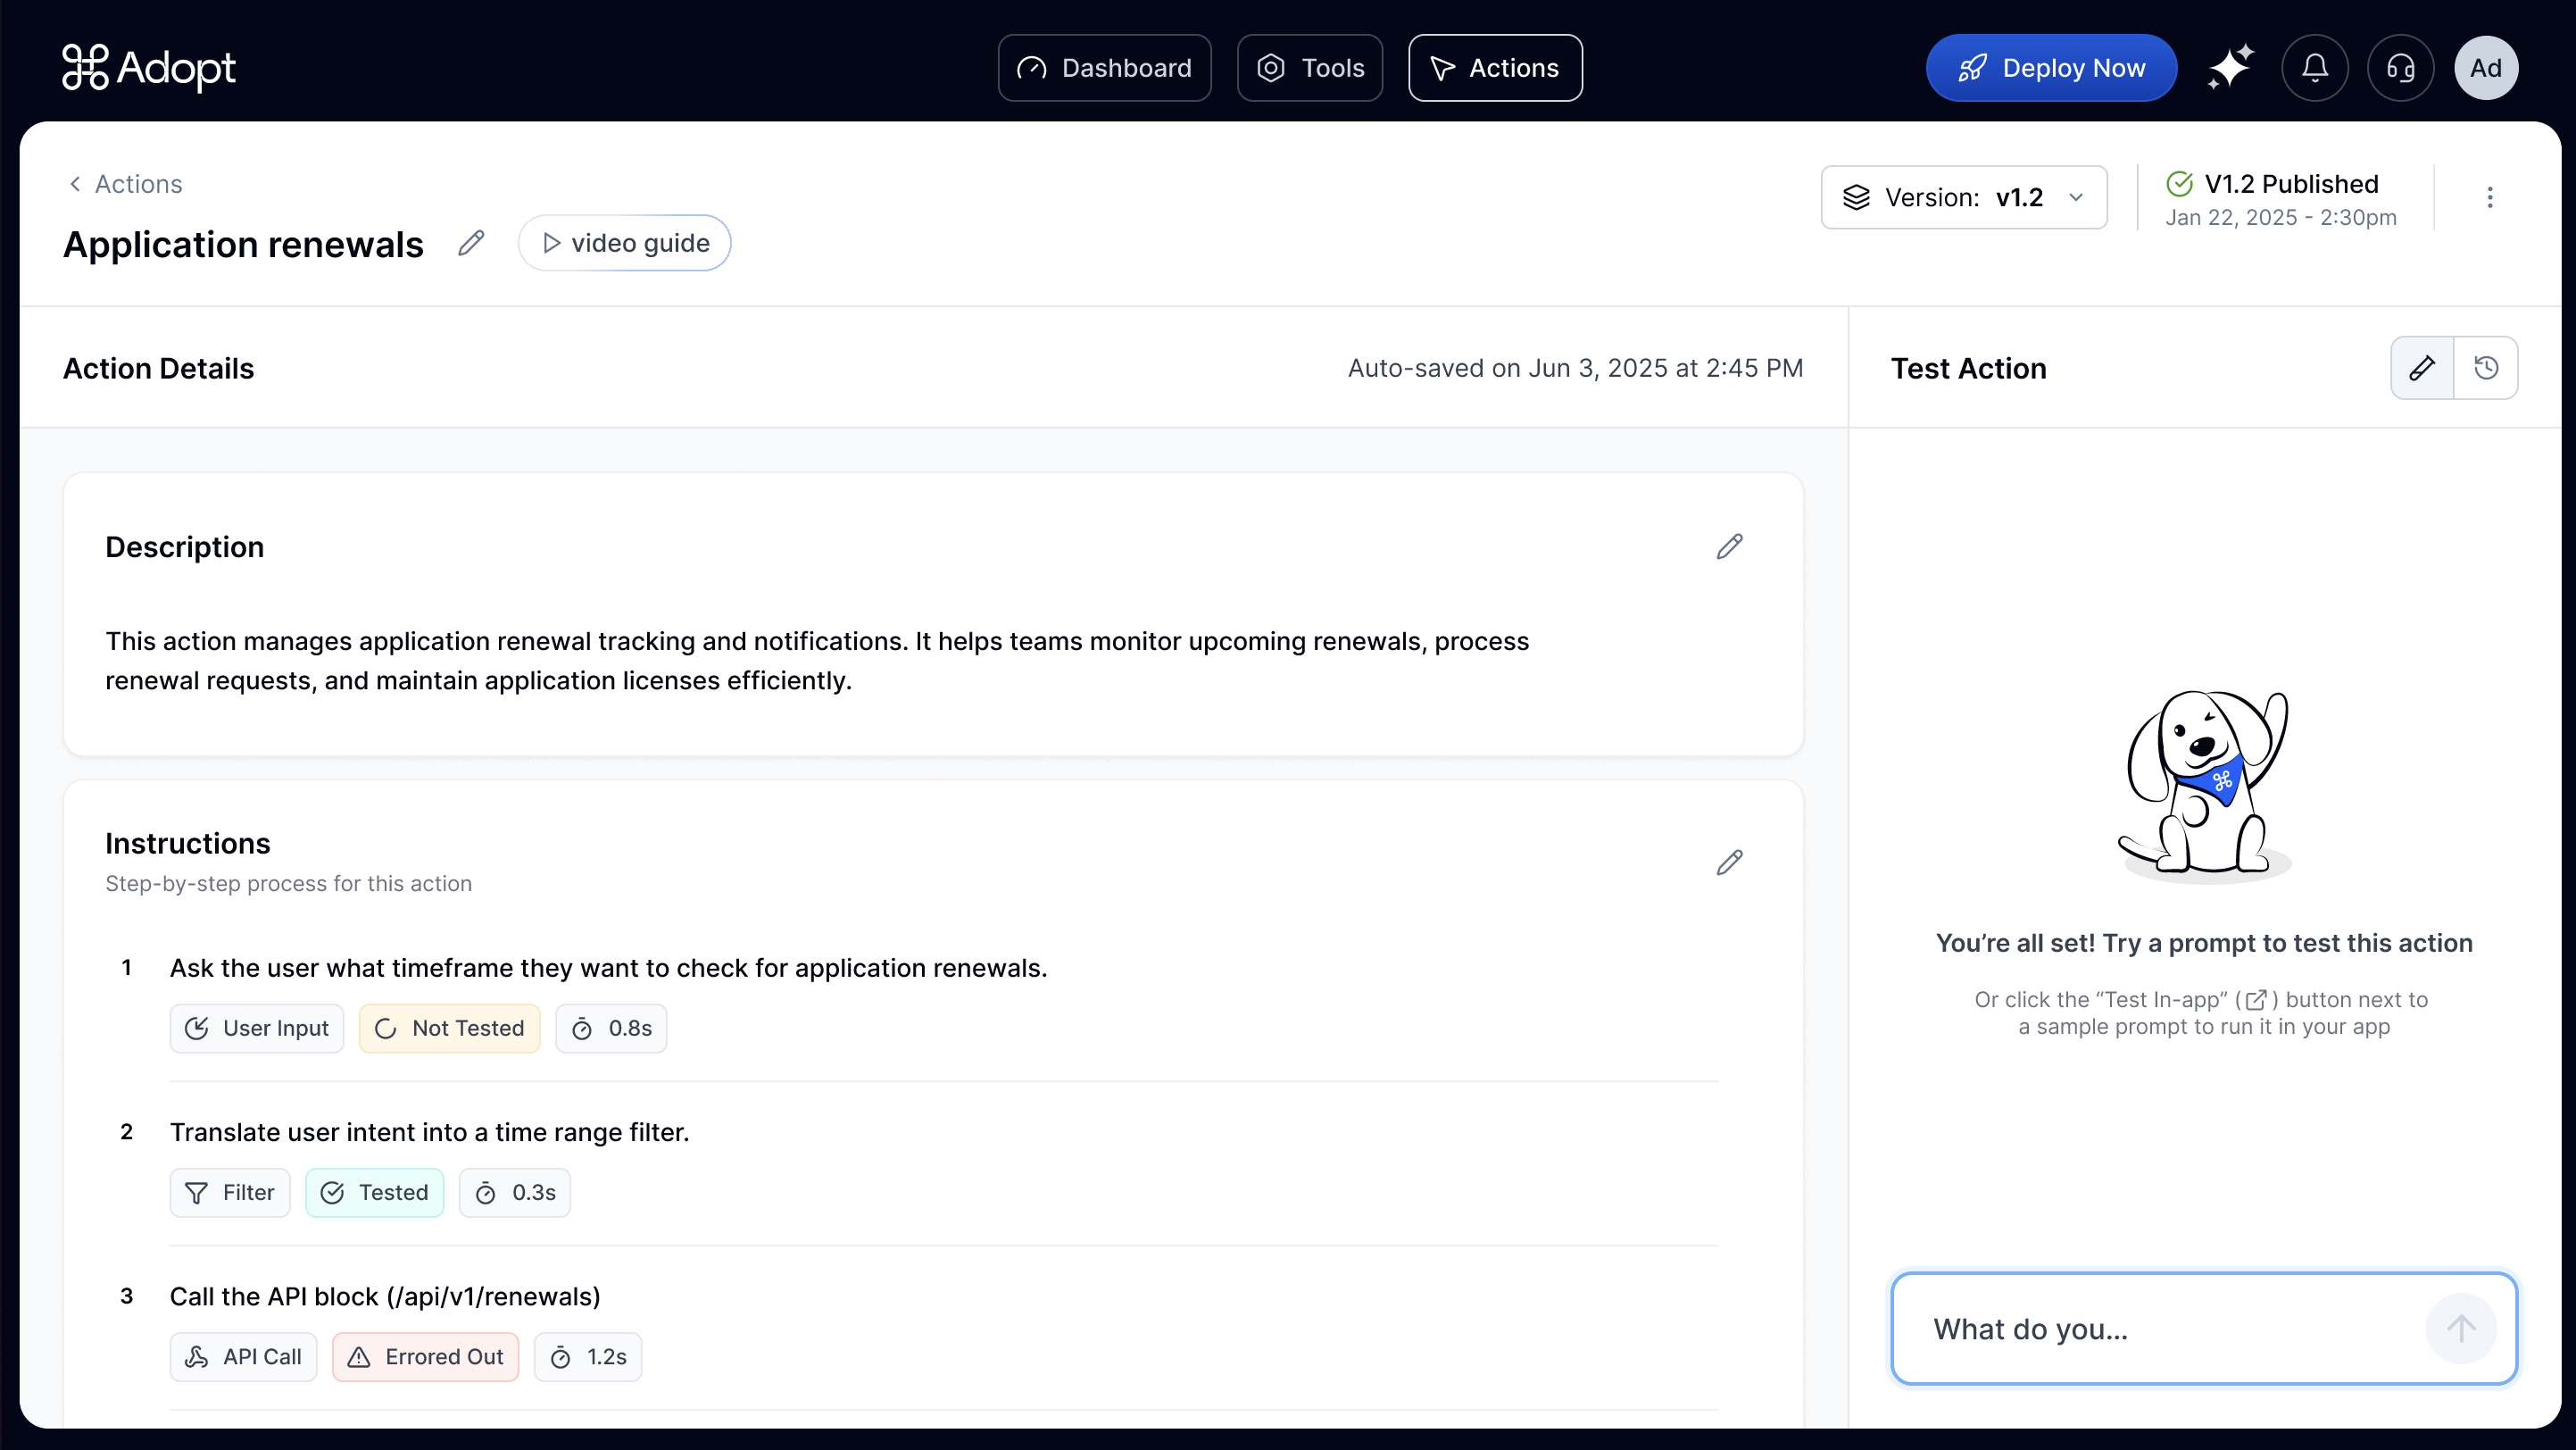 Once your action is created—either by you or auto-generated by Adopt—you’ll be taken to the Action Details Page. This is your command center for reviewing, testing, and fine-tuning how the agent will execute this action.
Here’s a quick walkthrough of the key sections you’ll see:
Once your action is created—either by you or auto-generated by Adopt—you’ll be taken to the Action Details Page. This is your command center for reviewing, testing, and fine-tuning how the agent will execute this action.
Here’s a quick walkthrough of the key sections you’ll see:
Description
This is a high-level summary of what the action does, written in natural language. It’s auto-generated based on your inputs when creating the action—think of it as a quick confirmation that the agent has understood your intent correctly.Instructions
Instructions are the heart of the action. This section outlines the step-by-step logic the agent will follow to complete the task—from gathering user input to calling APIs and formatting outputs. You’ll be able to edit, reorder, delete, or add new steps as needed (we’ll cover that in detail next).Test Action (Right-side Panel)
On the right side of the page, you’ll find the Test Action panel. This is where you can see your action in motion. Type in a natural language prompt—just like your end user would—and the agent will attempt to execute the action using the steps you’ve defined in the Instructions. It’s a quick way to validate whether the action behaves as expected.Example Prompts
Below the test box, you’ll see a list of example prompts. These are clickable and serve as useful reference points—they highlight common phrases or variations that would trigger this action. Clicking on any of these will run the test automatically, letting you observe how the agent handles different language inputs.Don’t worry - your action isn’t limited to just these phrases. Adopt’s agent is built to understand a wide range of natural language inputs and will dynamically map user intent to the right action, even if the phrasing changes.