Overview
Creating a Pipeline in Adopt AI is a three-step wizard followed by an AI-generated workflow you can refine before activating. The entire process takes about five minutes. This guide walks through building a pipeline called QuickBooks Expense Aggregation as an example.Step 1 — Navigate to Pipelines
From the left sidebar, navigate to the Pipelines. You’ll land on the All Pipelines list. This shows all pipelines in your current project, along with their status, data source, schedule, and last update.Step 2 — Start a New Pipeline
Click the + New Pipeline button in the top-right corner.
Step 3 — Configure the Source (Step 1 of 3)
3.1 Name your Pipeline
Enter a descriptive name in the Pipeline Name field. Choose something that clearly conveys the data being extracted and its purpose. Examples:QuickBooks Expense AggregationHubSpot Deal SyncSalesforce Account Overview
3.2 Select your data source
Choose how data will be sourced:- Connectors — pull data from an external system (HubSpot, AWS S3, QuickBooks, etc.)
- Internal Data Store — read from data already stored in Adopt AI
3.3 Select a Connector
Under Source Connector, you’ll see your available connectors. Click a connector card to select it.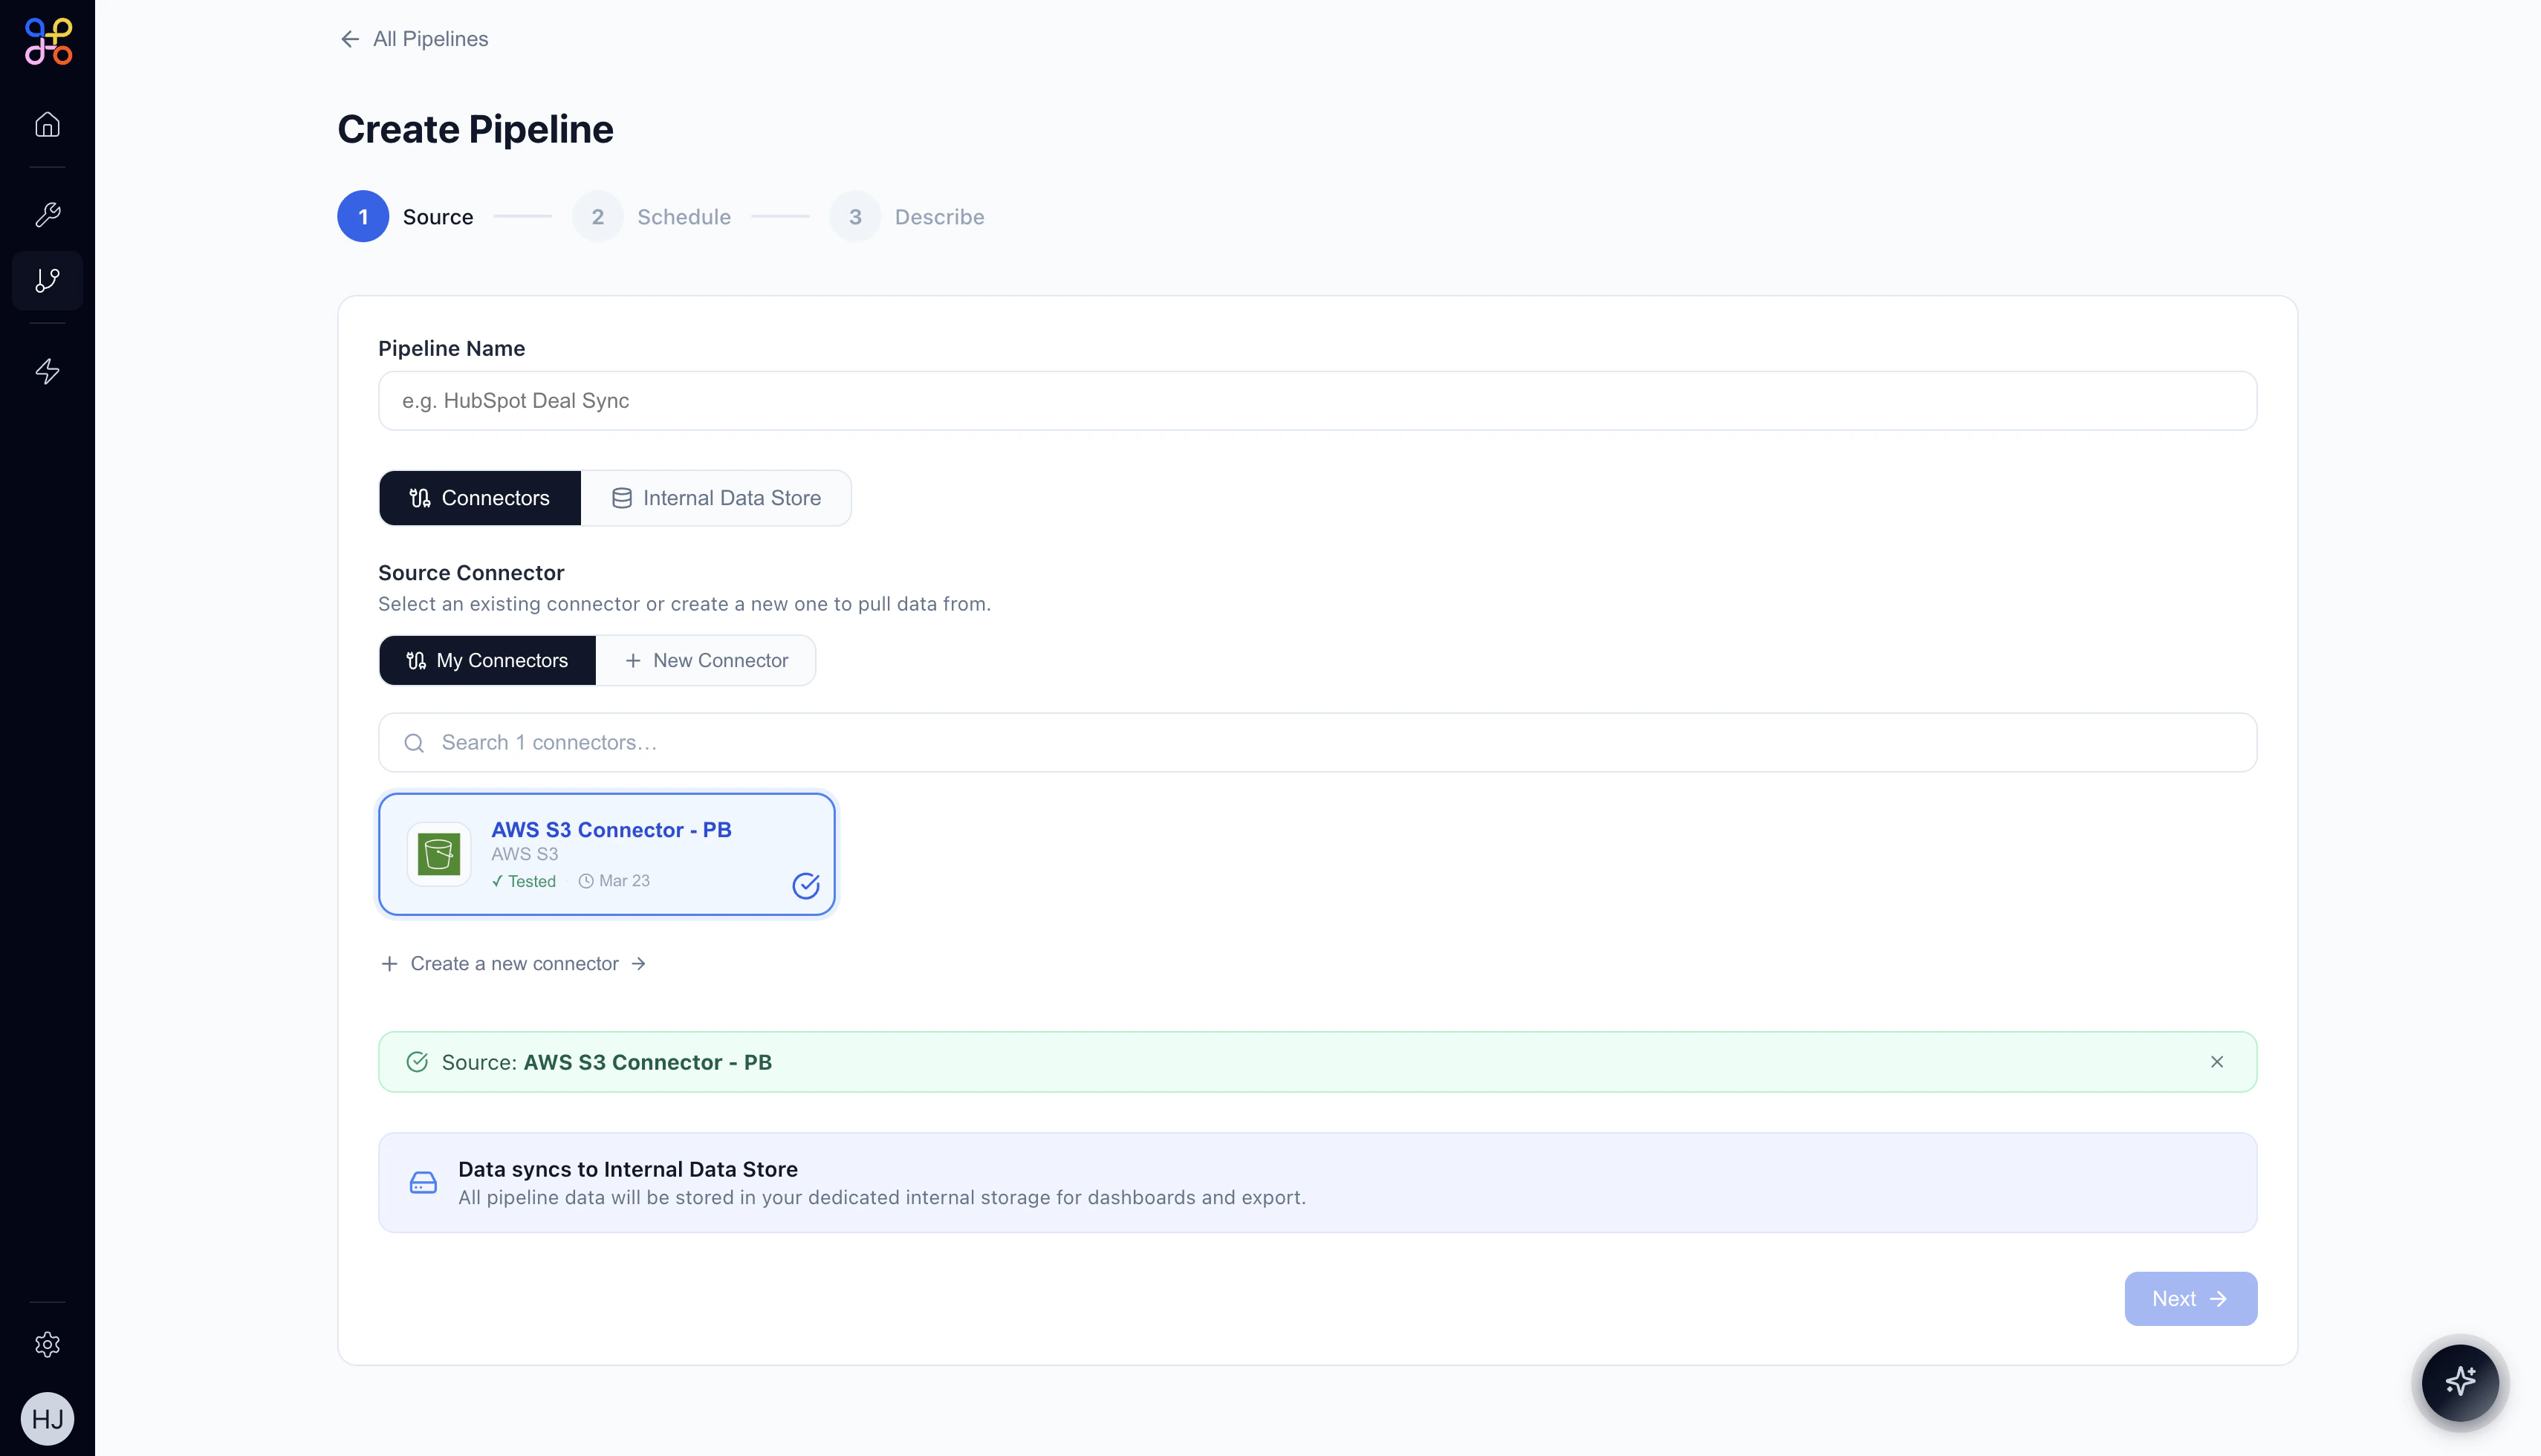
If you don’t have a connector for your data source, click + New Connector or “Create a new connector →” to set one up.
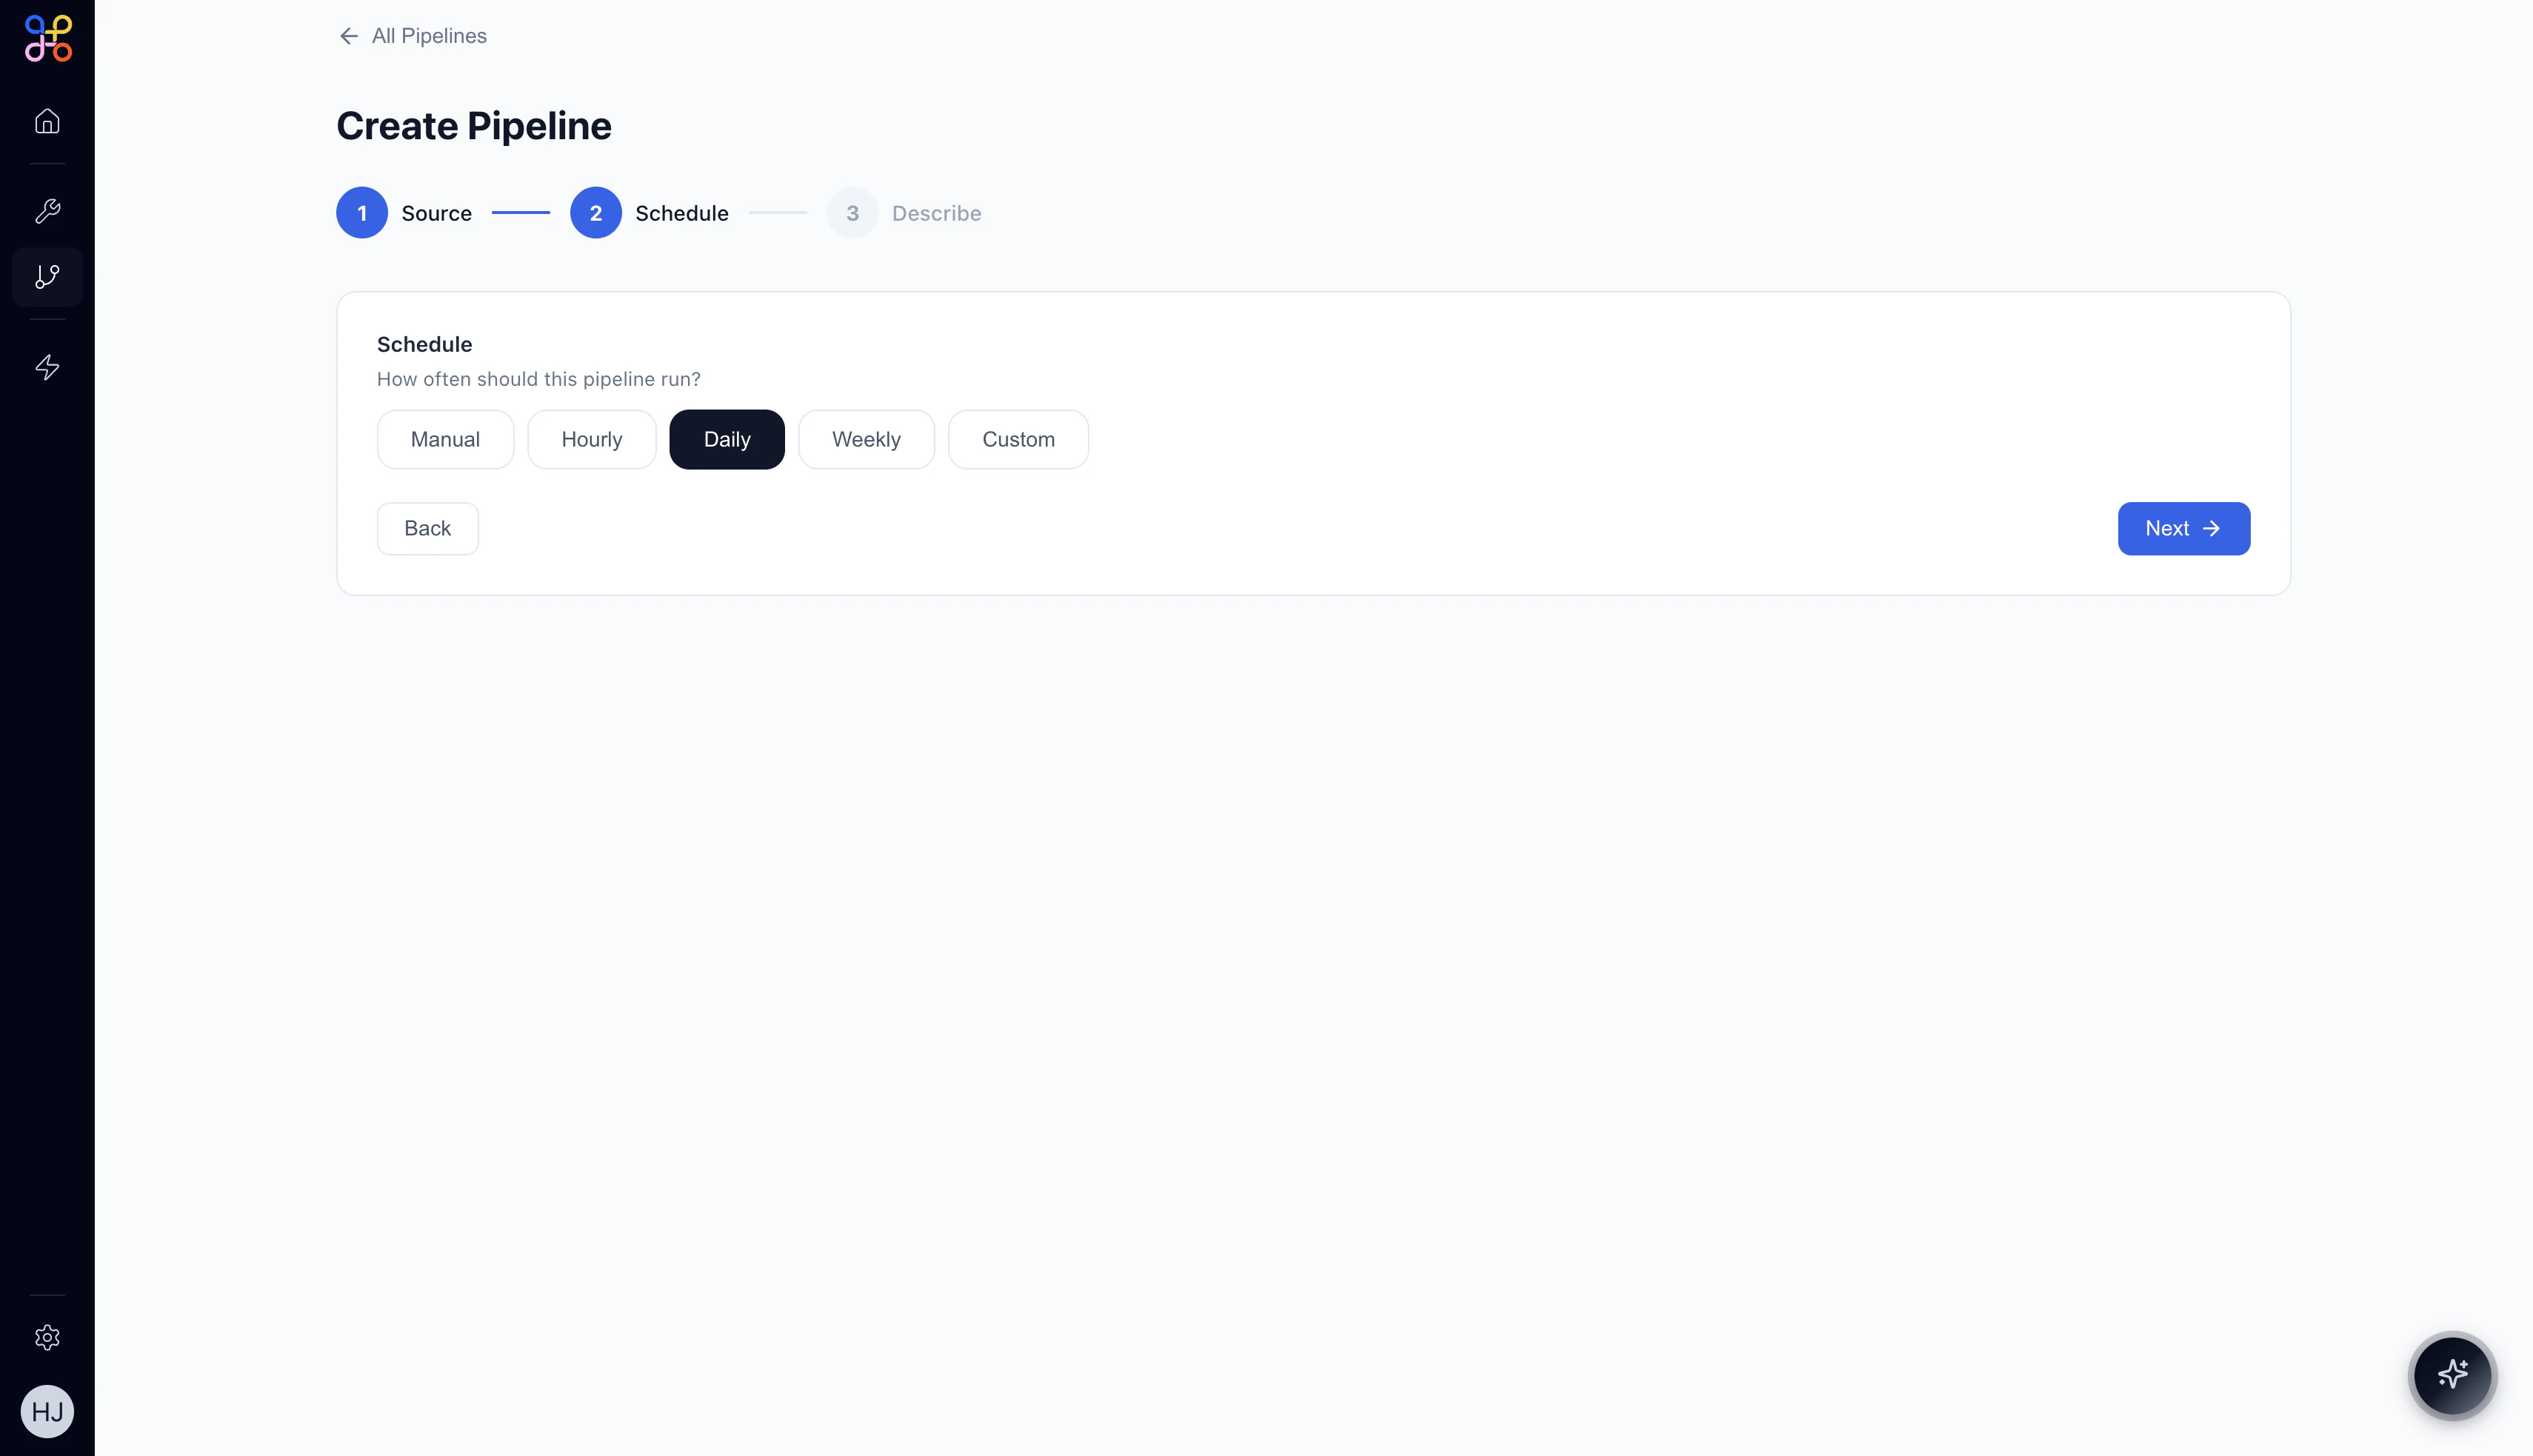
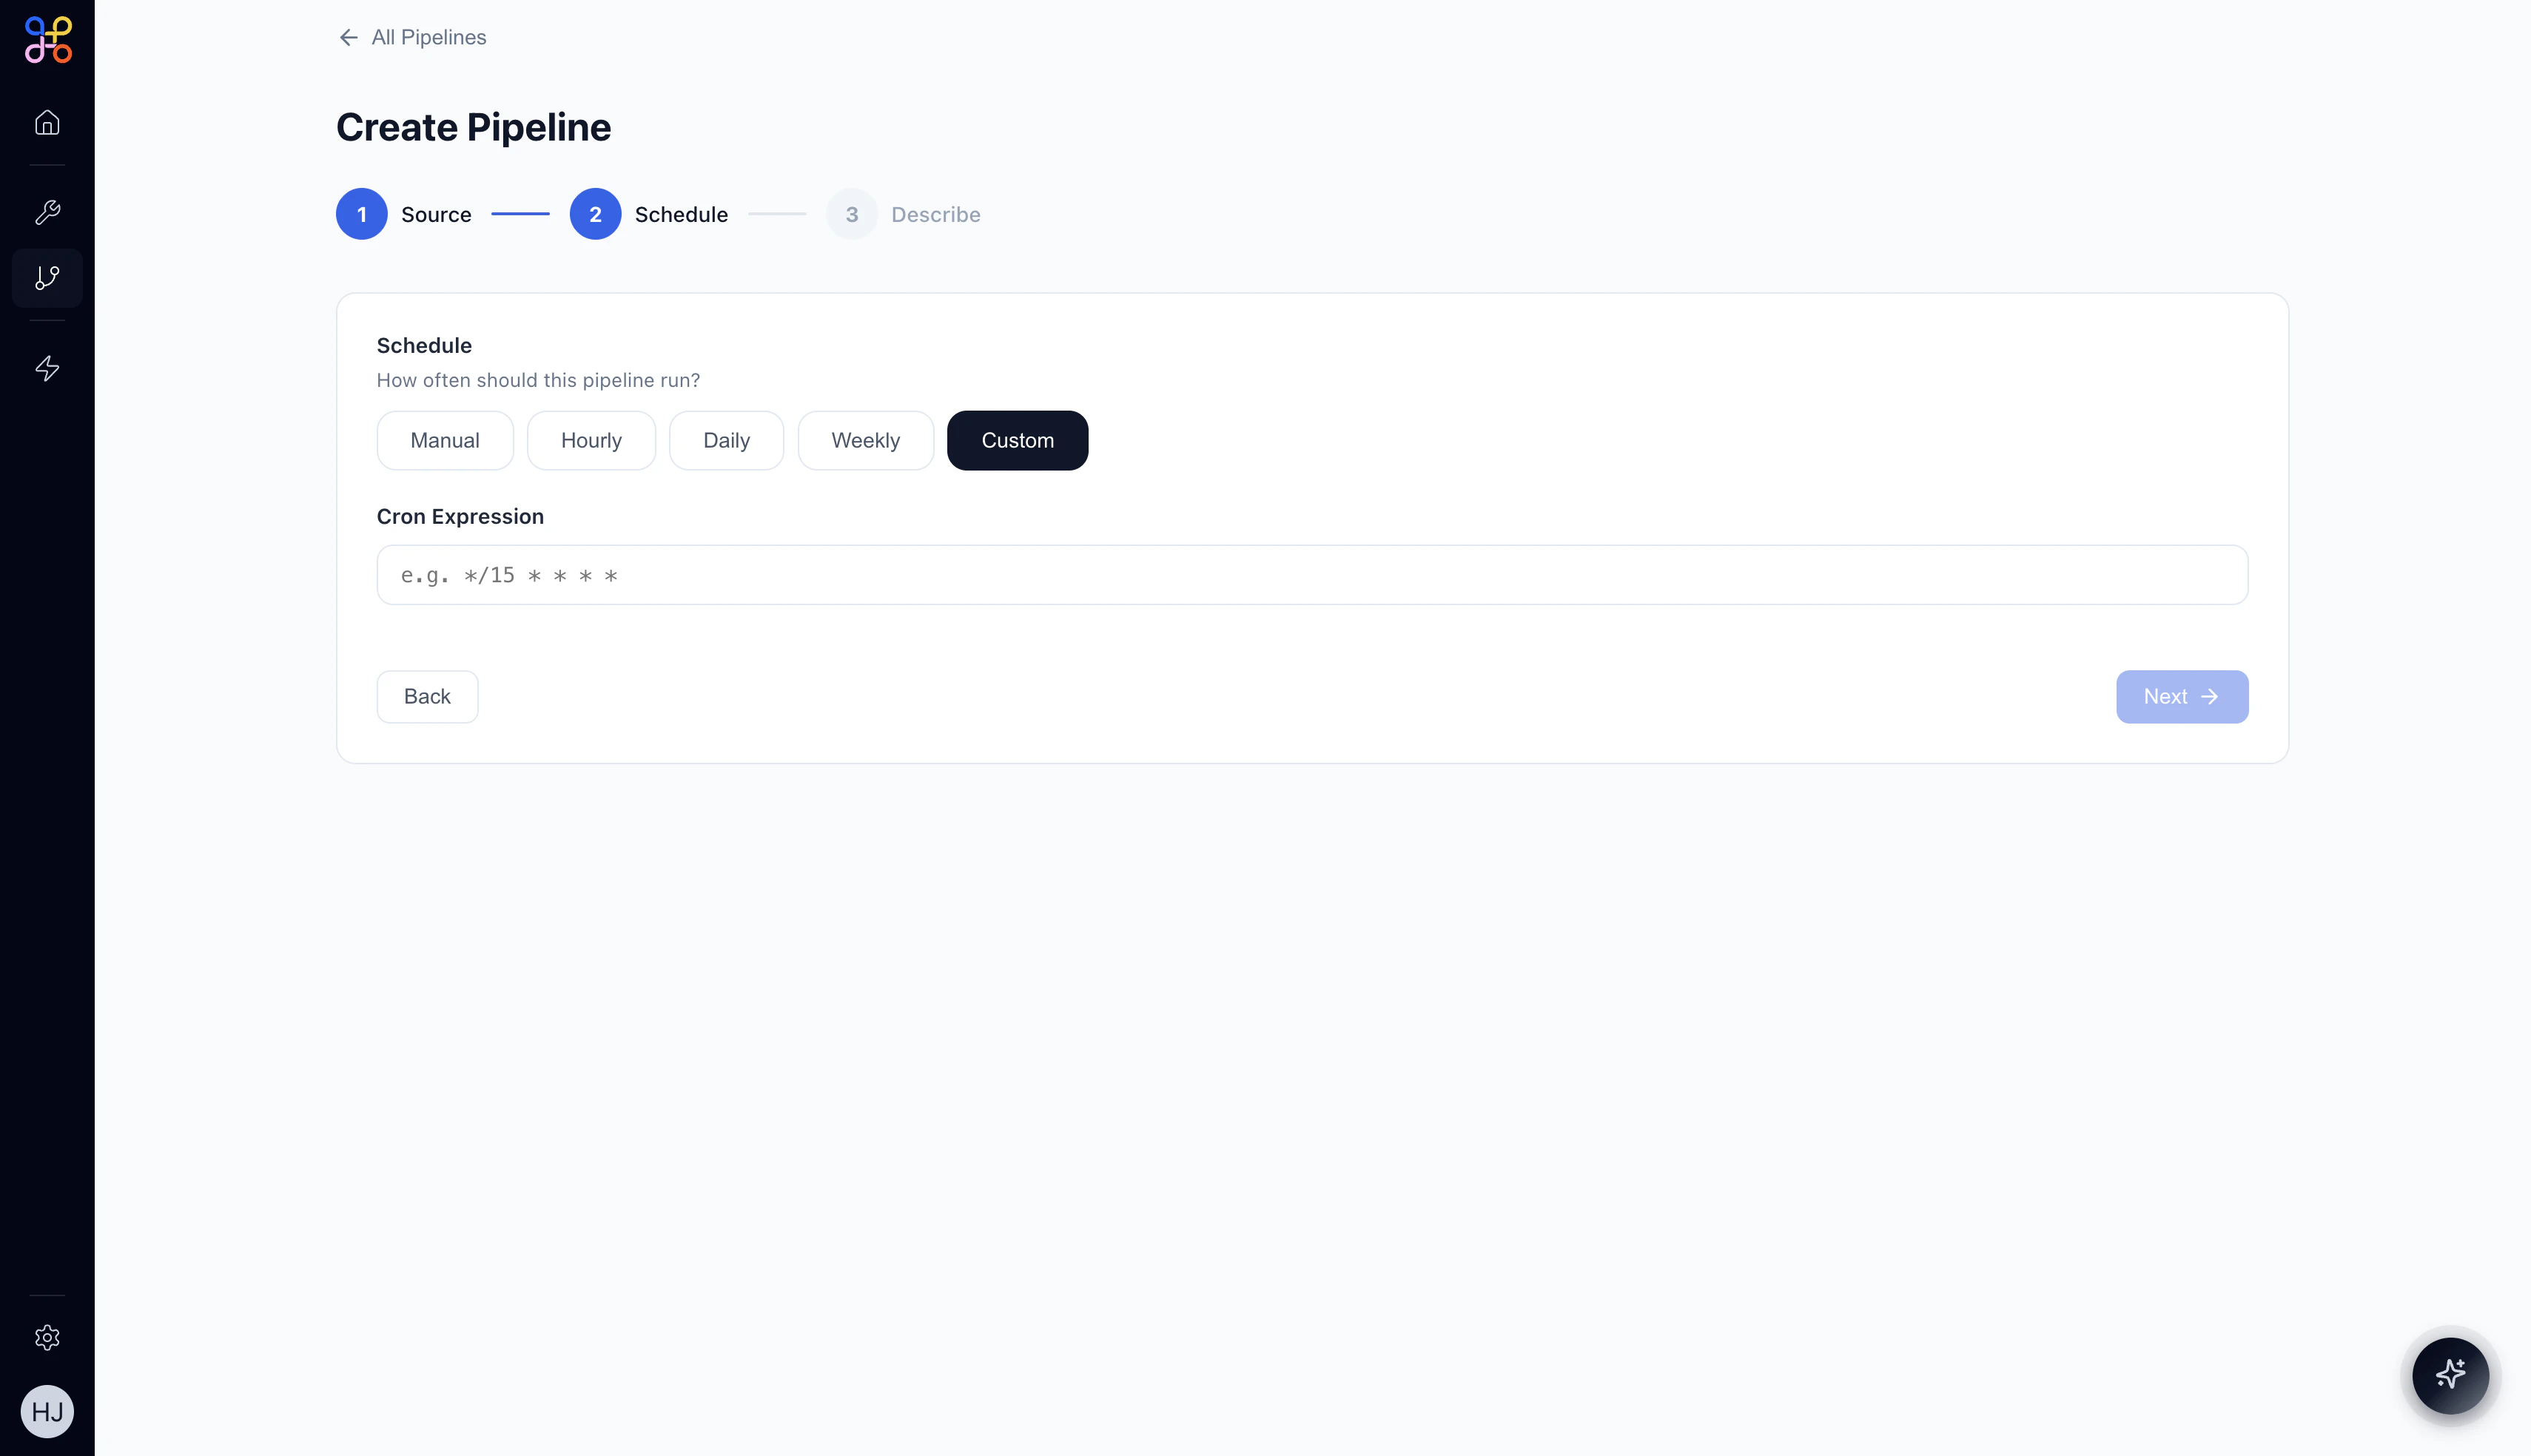
Step 4 — Set the Schedule (Step 2 of 3)
Custom schedule reveals a Cron Expression field. For example,
*/15 * * * * runs every 15 minutes.
Step 5 — Describe the Pipeline (Step 3 of 3)

- What data to extract
- Any filters or conditions
- How to transform or aggregate the data
- What the final output should look like
Step 6 — Review the AI-Generated Workflow
After clicking Create, Adopt AI generates a complete workflow from your description. The pipeline enters Draft status while the AI builds the workflow graph.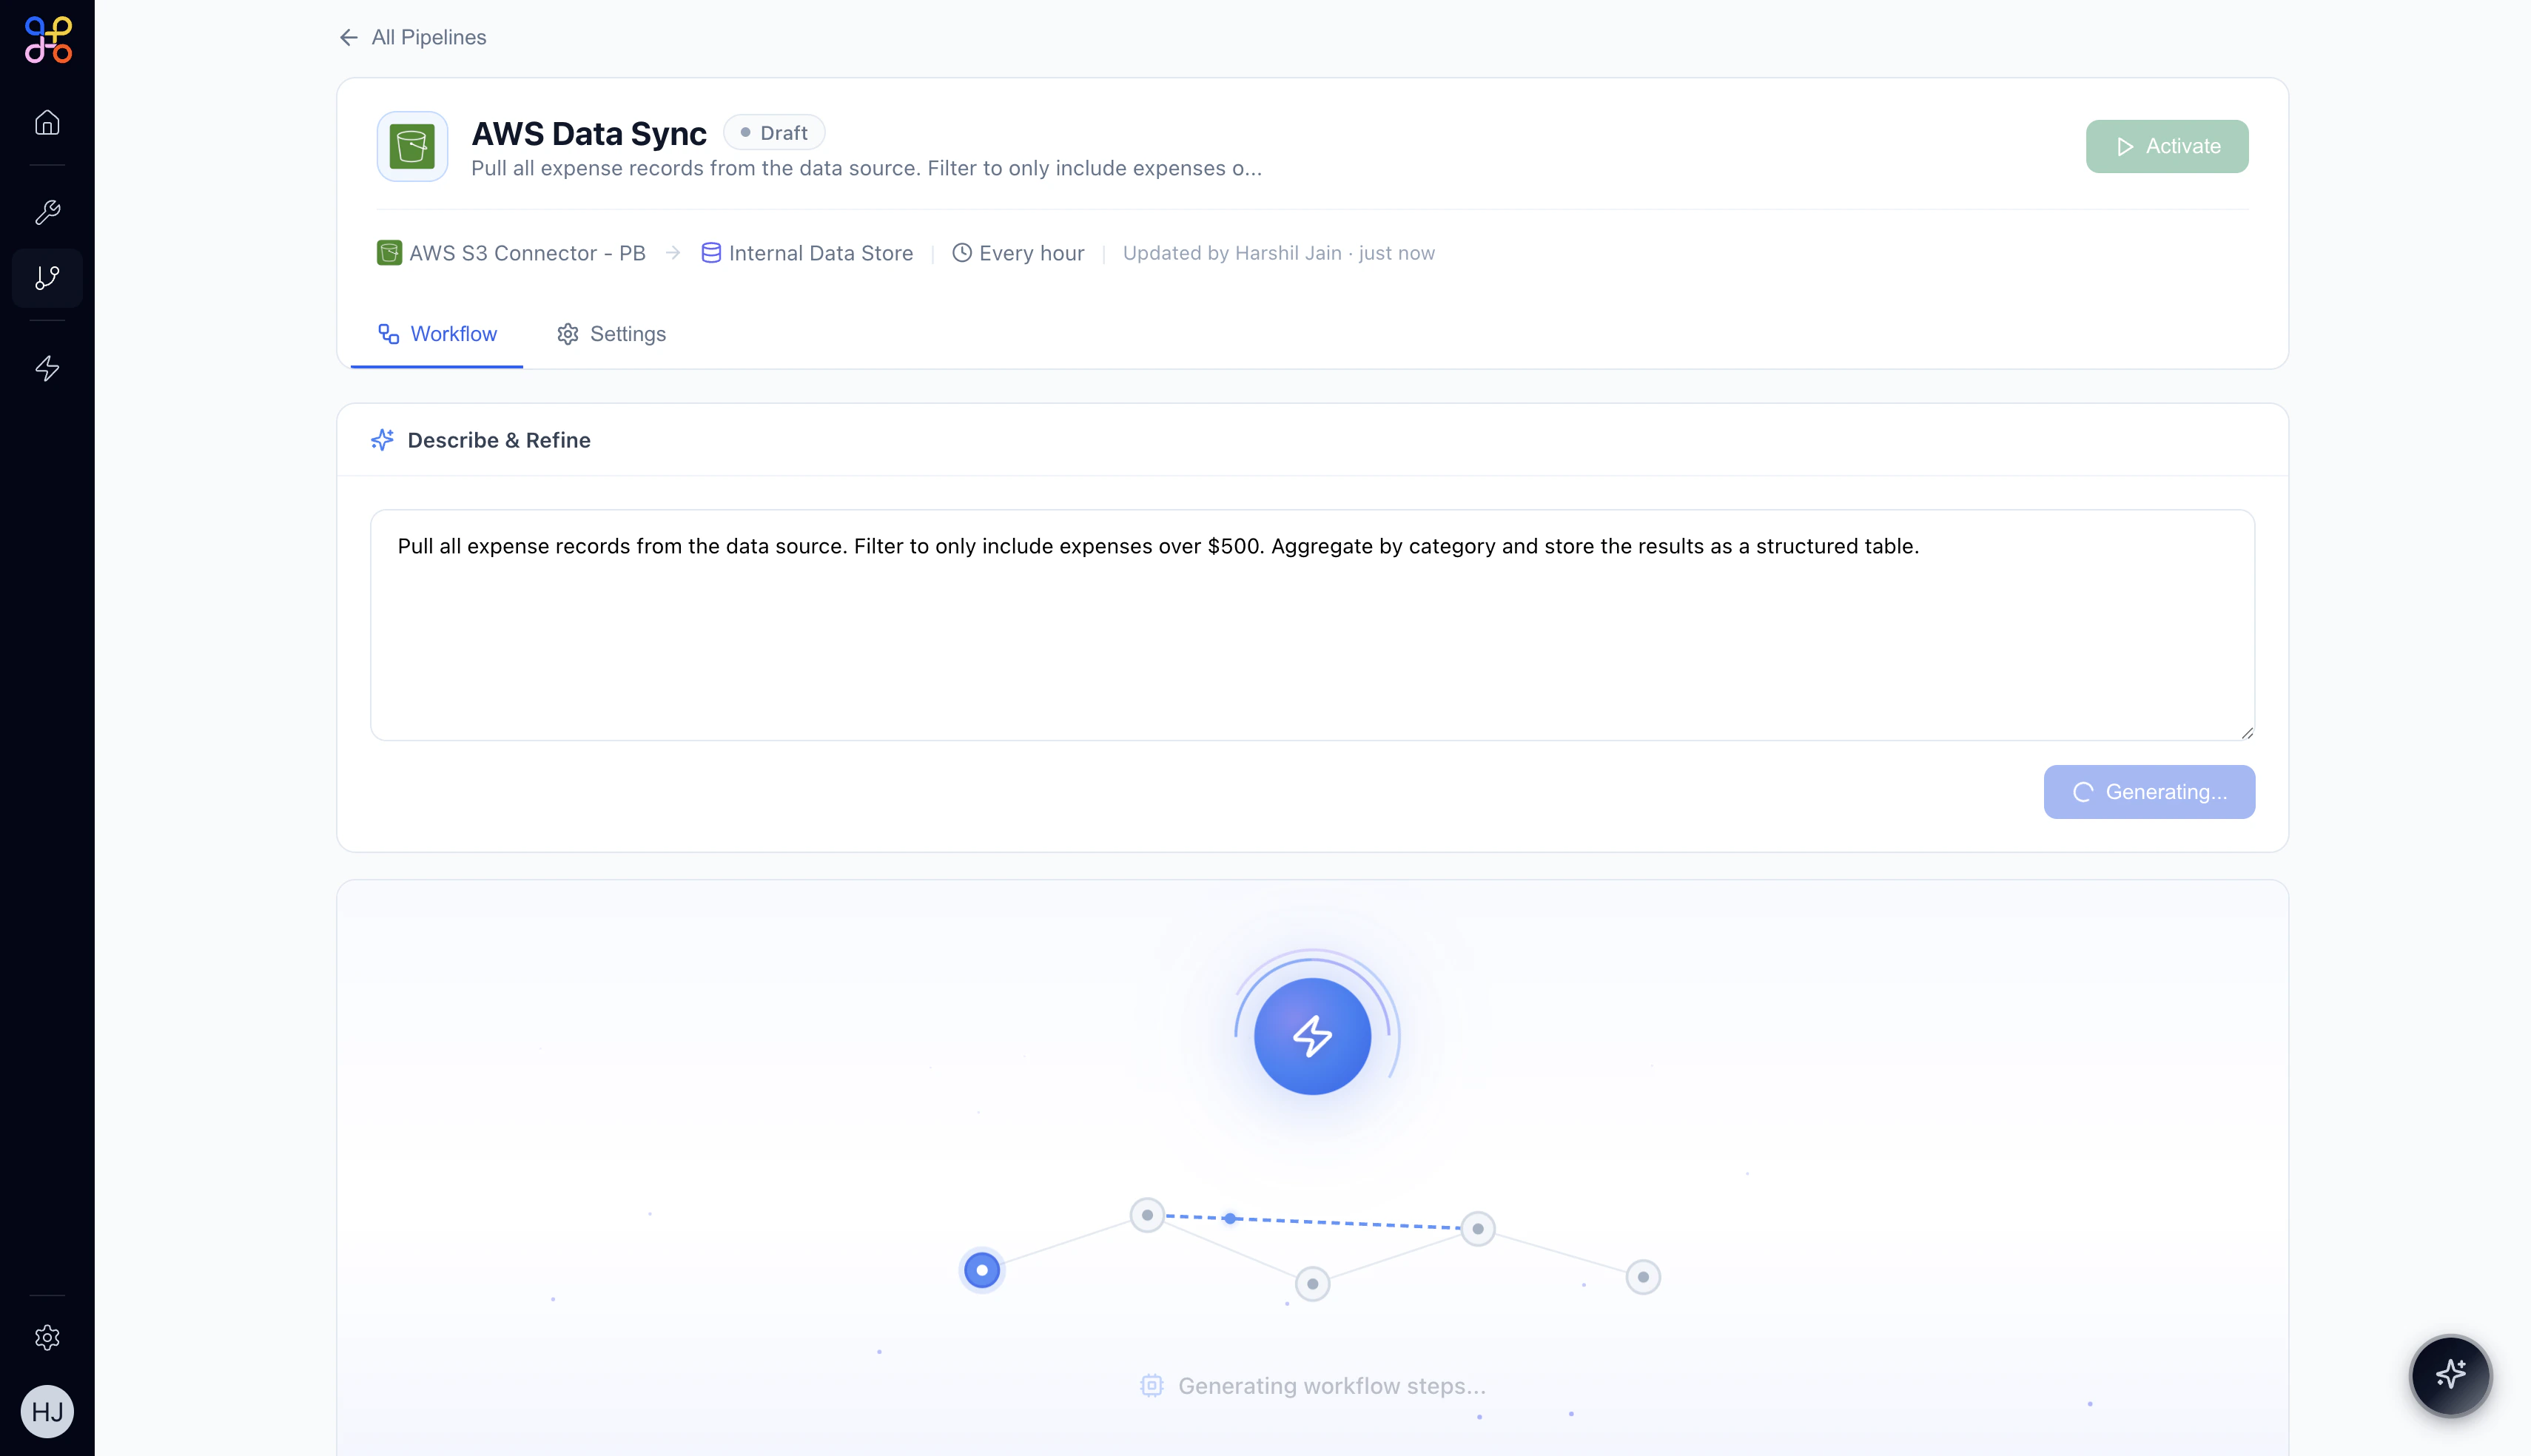
- READ DB — pulls data from your connected source
- FILTER — applies your filter conditions
- GROUP / TRANSFORM — aggregates or reshapes the data
- WRITE — stores the final output as a named Pipeline Outcome
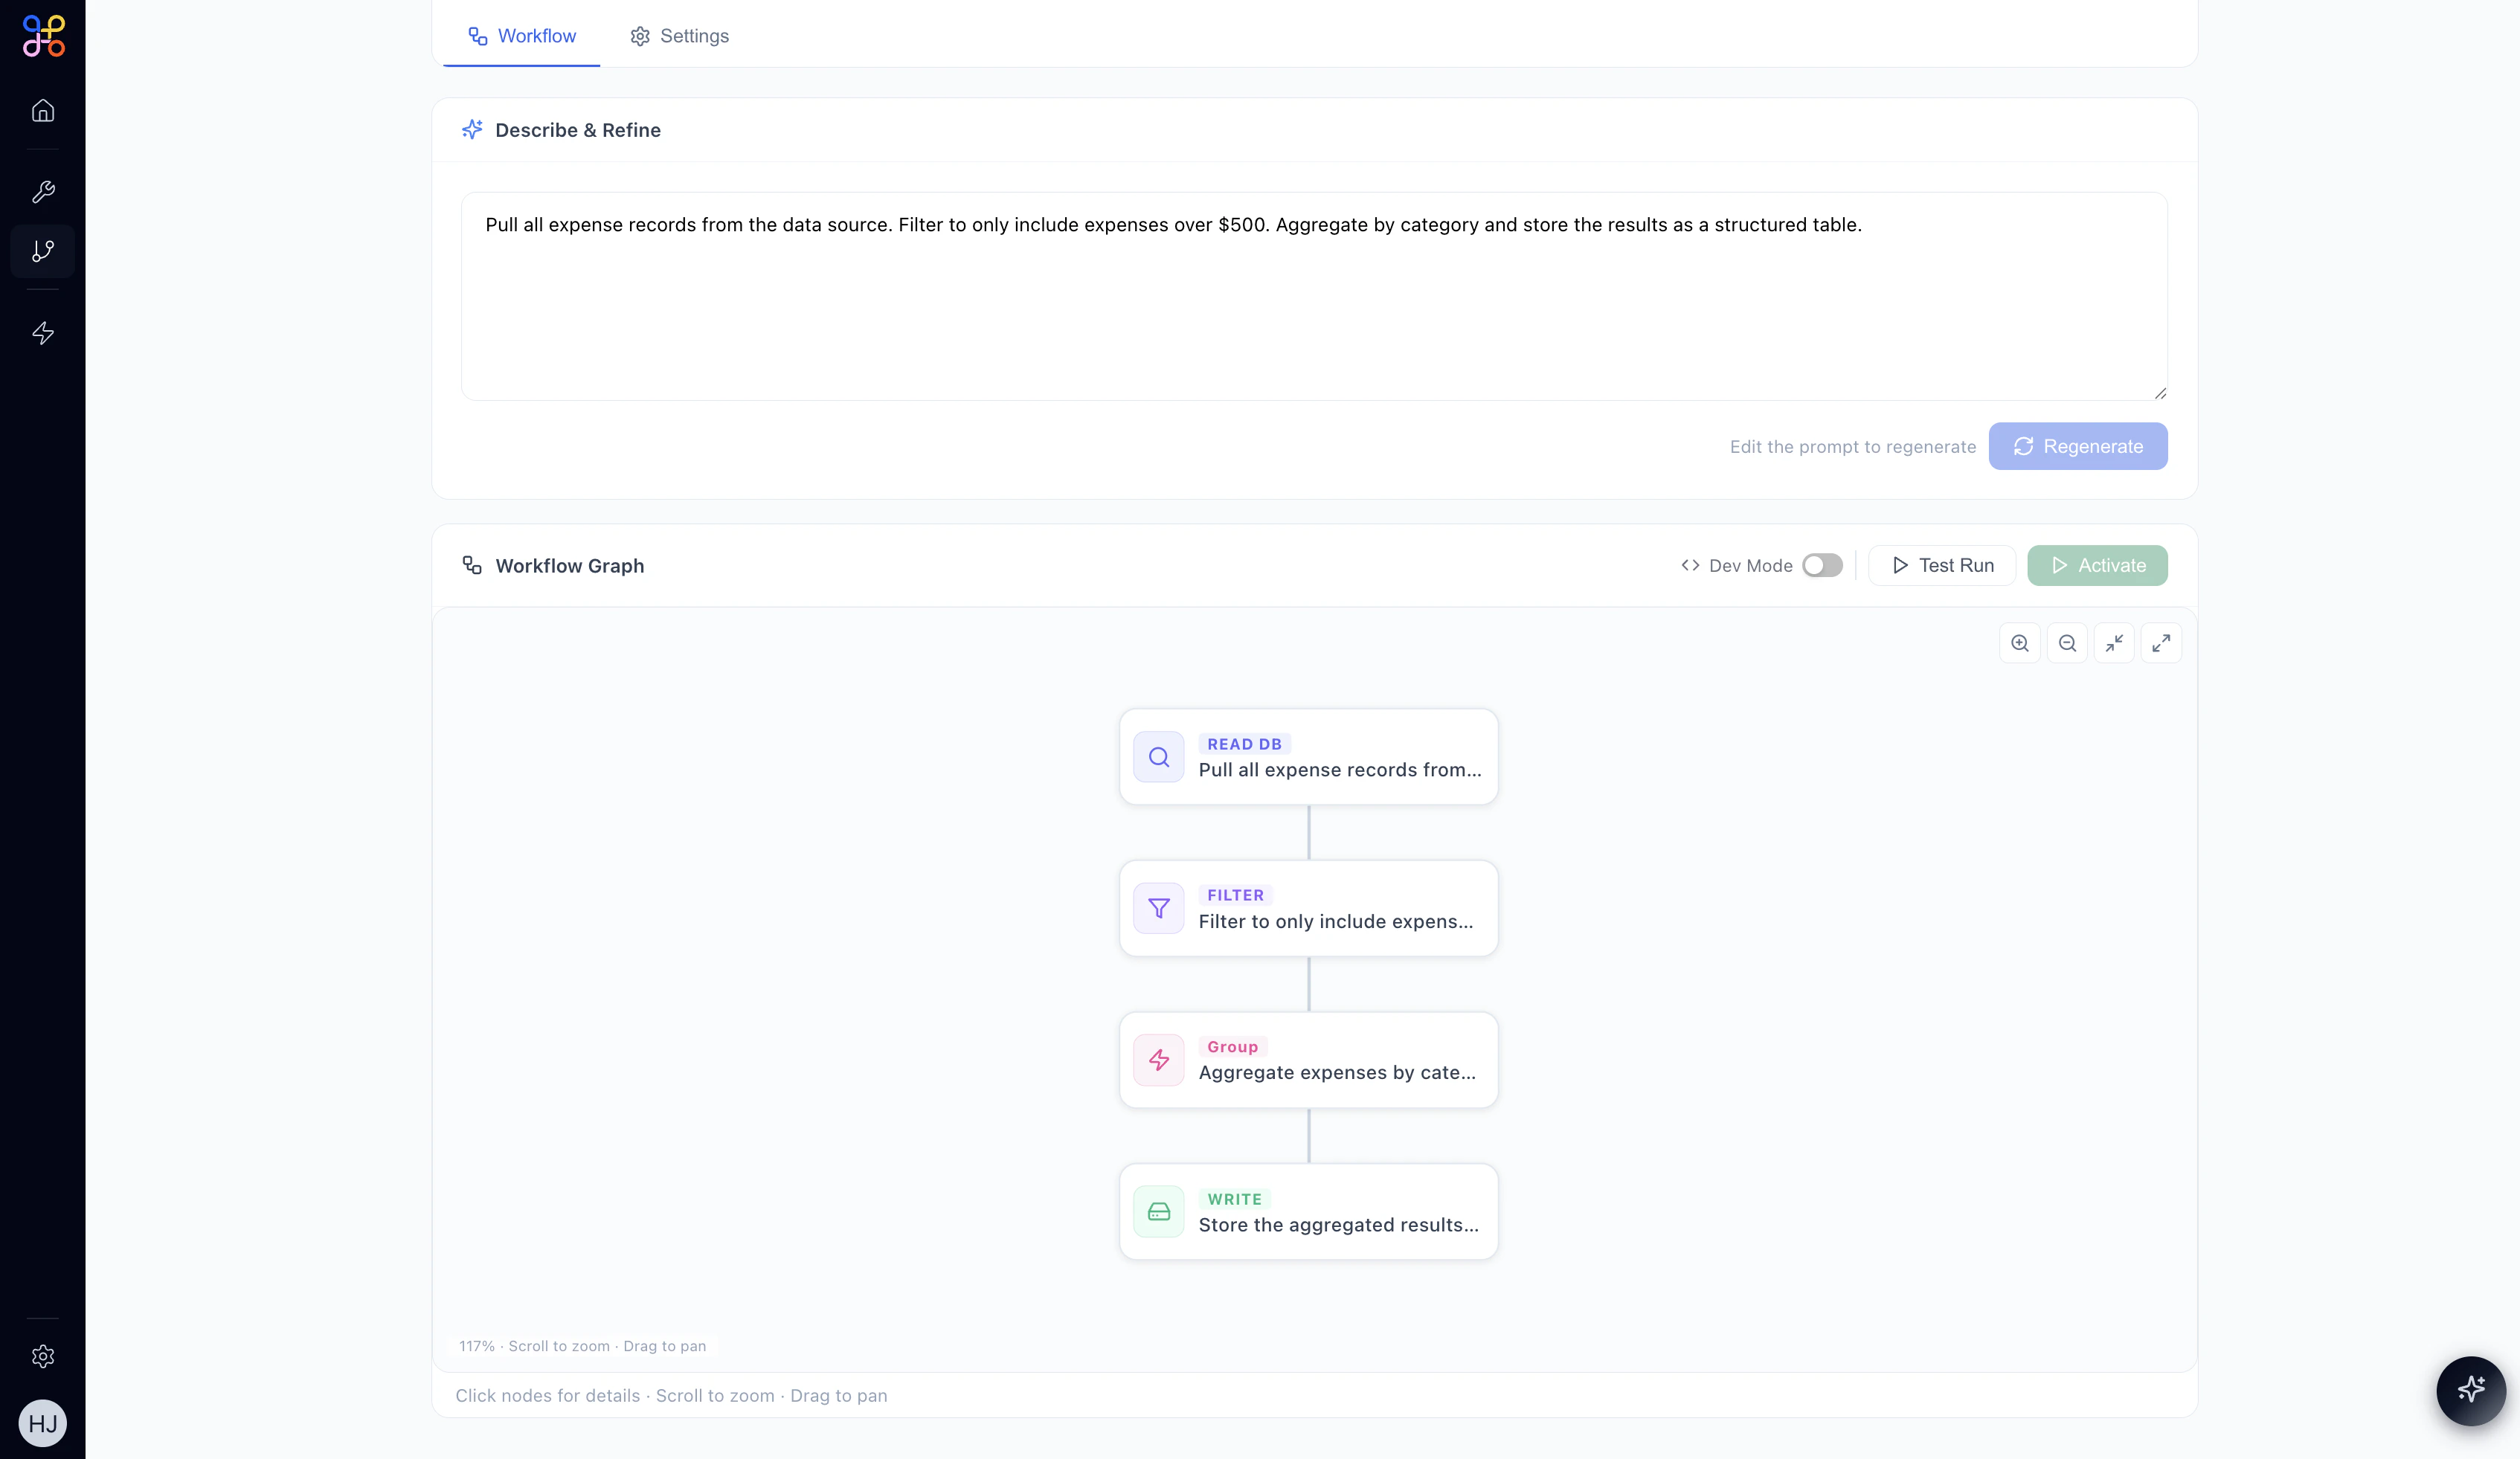
Refining the Pipeline
In Draft state you can:- Edit the description in the “Describe & Refine” text area and click Regenerate to create a new workflow
- Click individual nodes to inspect their configuration (fields and JSON view)
- Toggle Dev Mode to inspect the raw workflow definition
- Run a Test Run to validate the pipeline before activating
Step 7 — Activate the Pipeline
When you’re satisfied with the workflow, click the Activate button (top-right or within the Workflow Graph header). The pipeline will:- Change status from Draft to Active
- Begin running immediately on its first execution
- Continue running on the schedule you defined
What Comes Next?
Your pipeline is now running and producing data. Here’s what to do next:- View run history on the Runs tab — see every execution with its start time, duration, and status
- Preview the output data on the Data tab — inspect the Pipeline Outcome table
- Connect it to an Agent — add a Pipeline node in your agent canvas to give the agent access to this data
- Bind it to an Experience — surface the data in a HITL dashboard for human reviewers