The Action Details page shows you exactly what your action will do when a user triggers it. Let’s walk through each section.
The Action’s Purpose and Scope
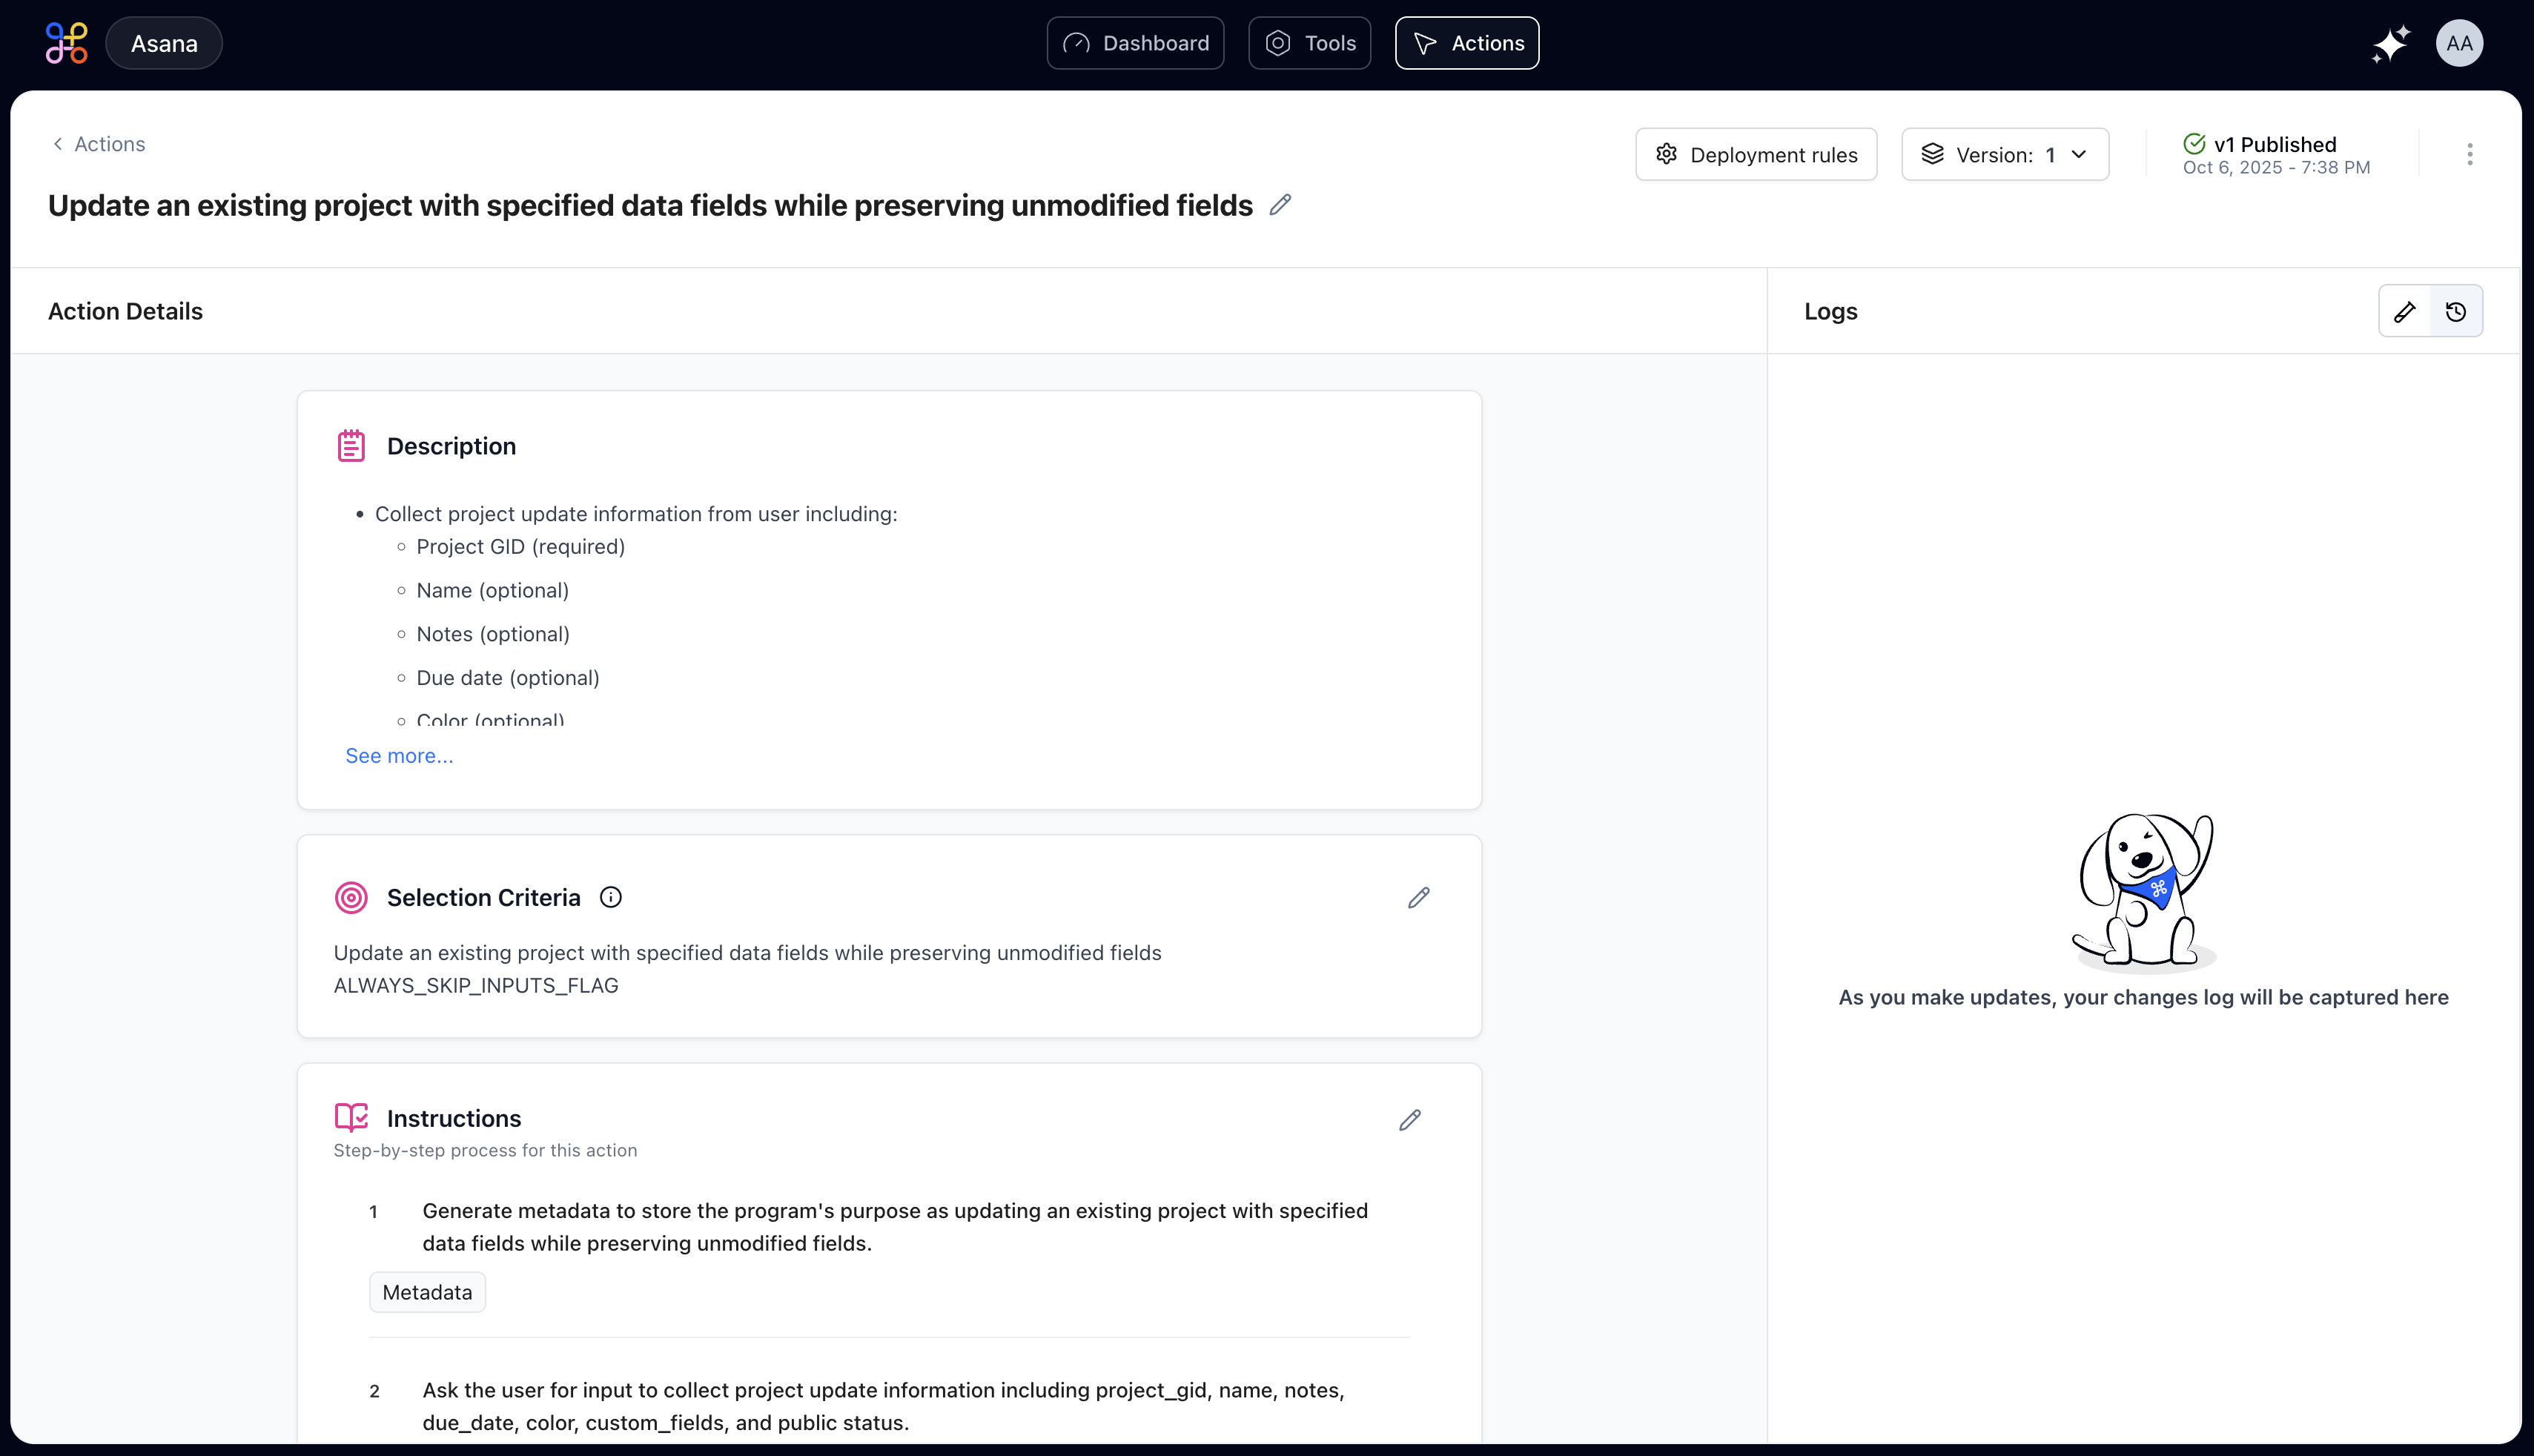
At the top, you’ll find a high-level summary that explains what your action does. This was generated from your description and serves as documentation for your team. If it doesn’t accurately reflect your intent, that’s a signal to refine your selection criteria. The Description provides a concise overview of the action’s functionality. It’s auto-generated but can be helpful for quickly understanding what an action does at a glance.Selection Criteria
The selection criteria determines when the AI chooses this action to fulfill a user request. It’s like a pattern matcher—when someone asks something that fits this pattern, this action runs.
How Selection Criteria Works
For example, if your action is about license renewals, the selection criteria might look like:Editing Selection Criteria
You can edit the selection criteria by clicking the pencil icon. Refining these criteria helps the AI pick the right action more accurately, especially when you have multiple similar actions.Instructions
The Instructions section shows you exactly what happens when this action runs, step by step. Each step has:
- A number indicating its position in the sequence
- A clear description of what it does
- A type badge showing what kind of operation it is
- Any associated tools or APIs being called
Reading a Workflow
Here’s a typical workflow example:Step Components
Each step includes: Step Number: Shows execution order Description: Explains what this step accomplishes Type Badge: Categorizes the operation (API Call, Data Processing, etc.) Tool Tags: Identifies which integrated tools are usedSteps execute sequentially from top to bottom. Data flows from one step to the next, with each step able to use outputs from previous steps.
Example Prompts
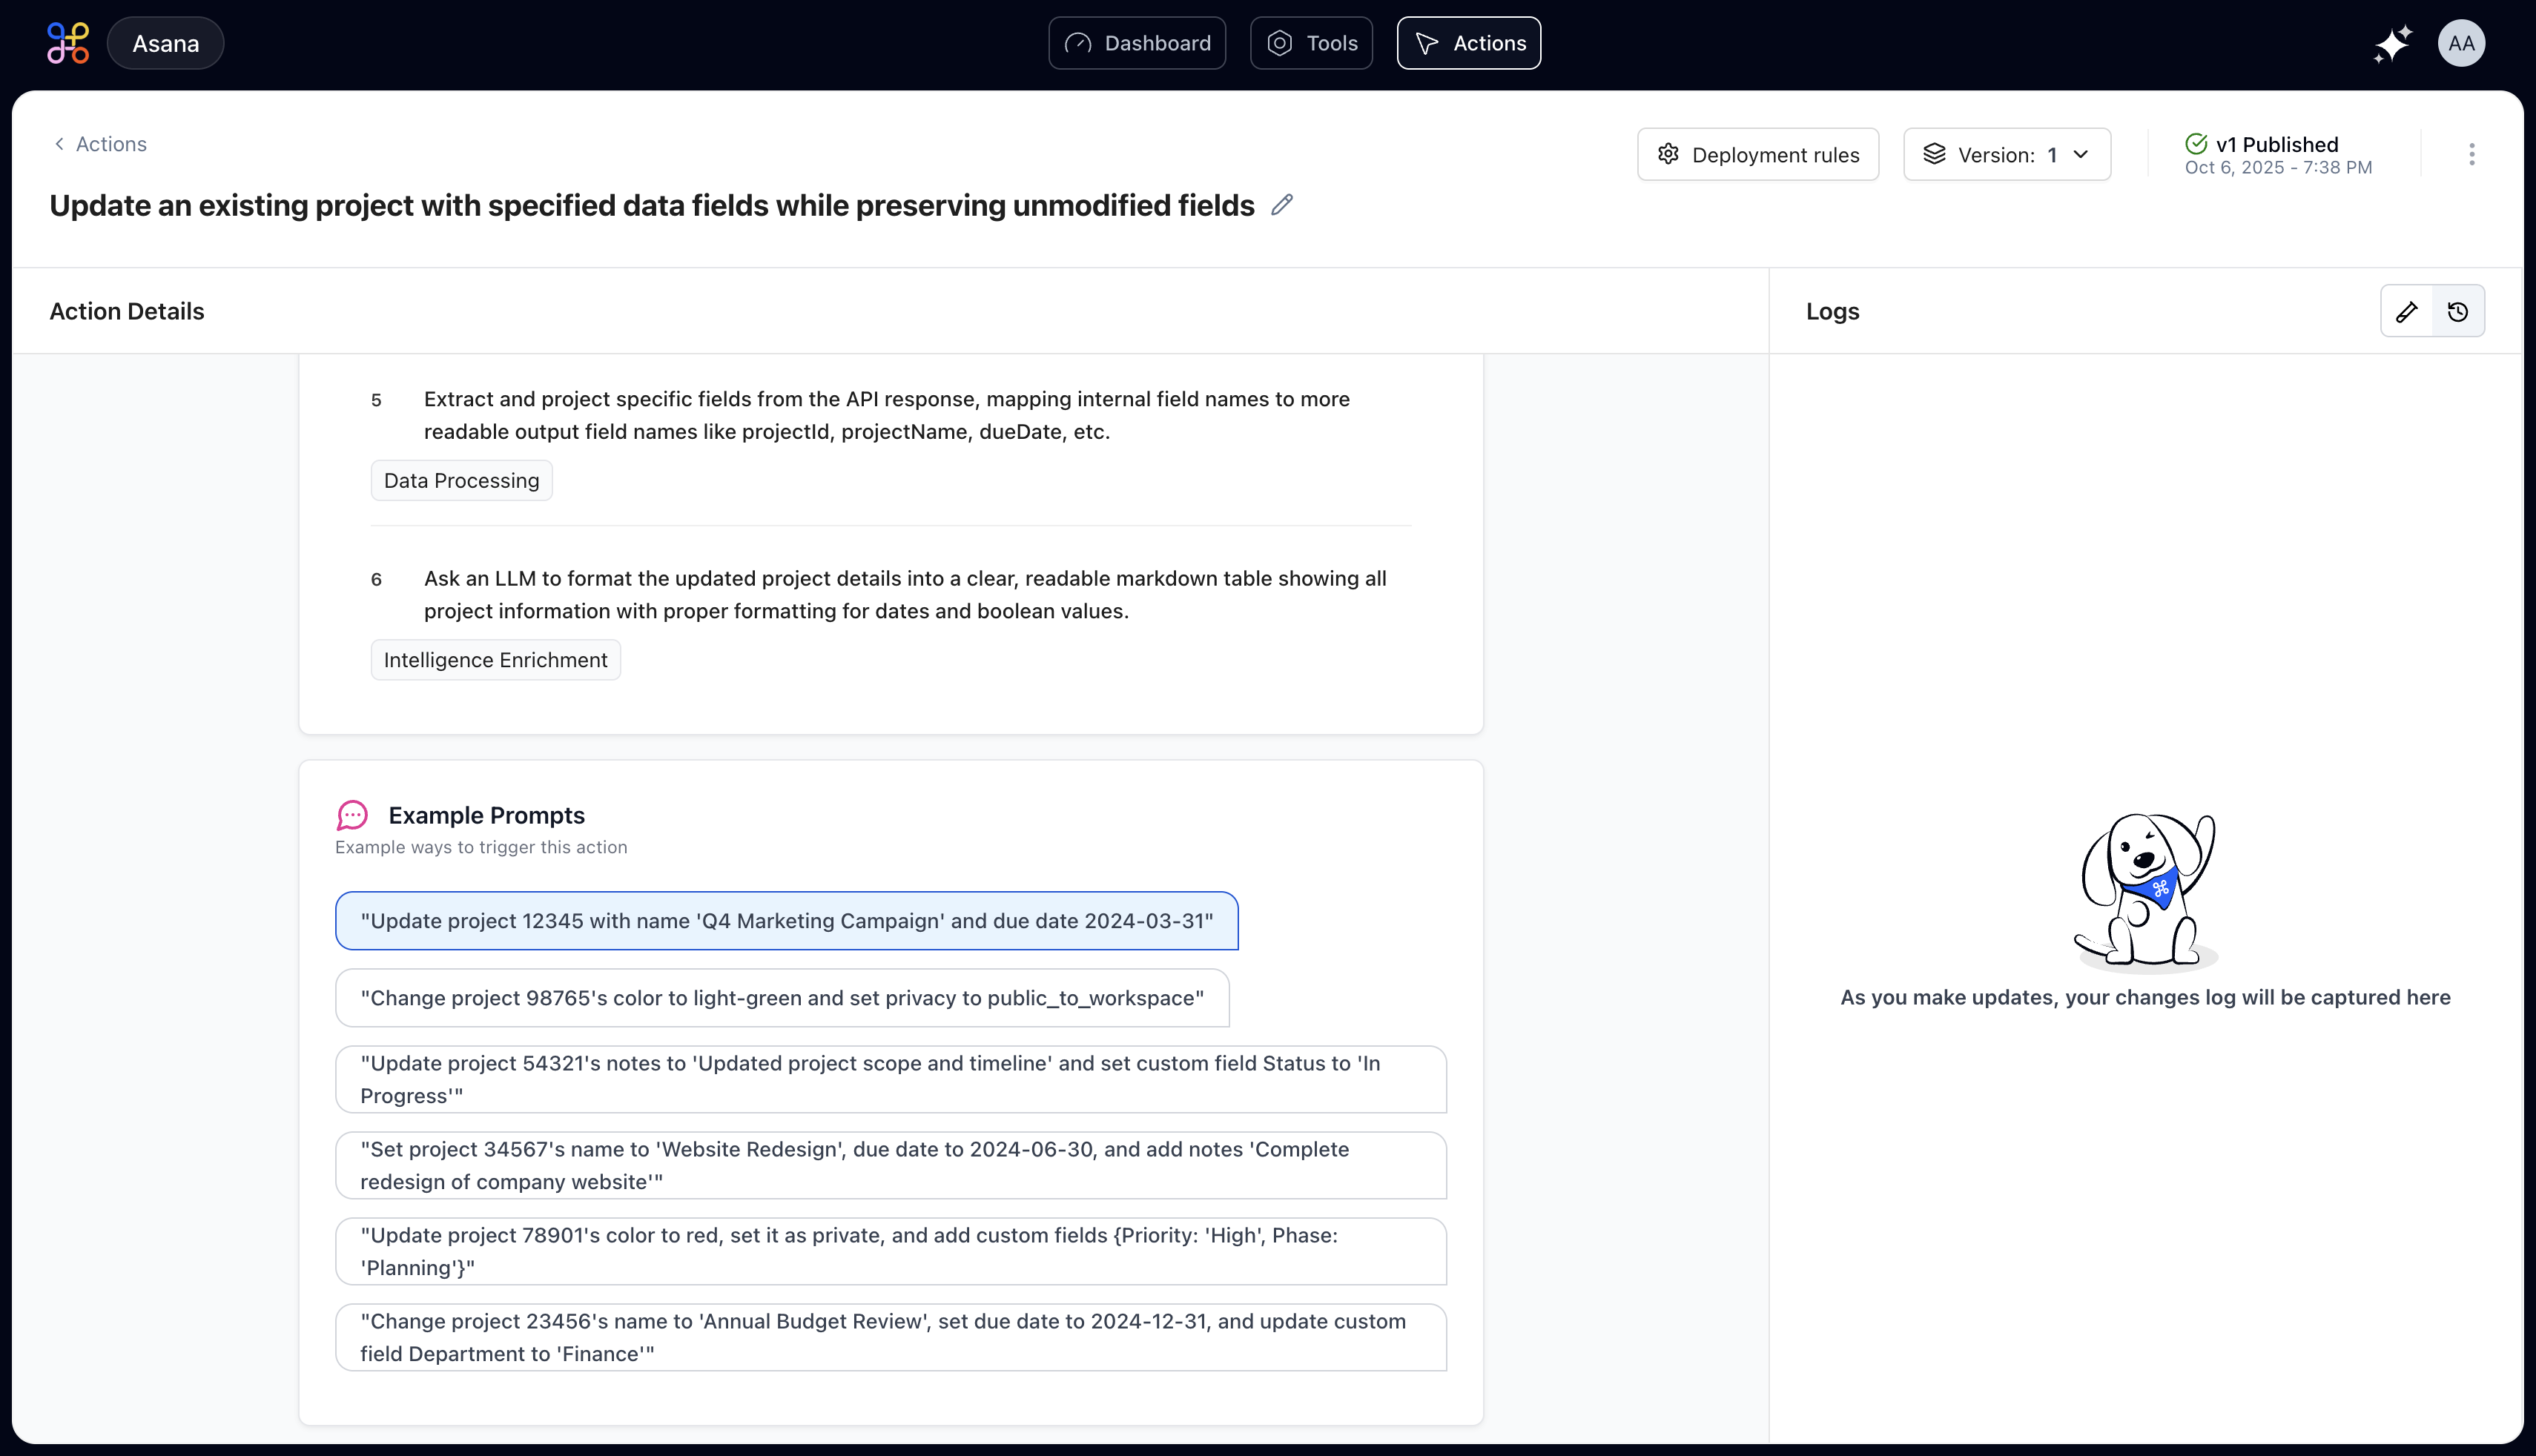
Using Example Prompts
Click any example prompt to:- Automatically run a test with that phrasing
- See how the action responds to different variations
- Validate that the action triggers correctly
Logs and Activity History
- When it was created
- When instructions were updated
- When it was submitted for approval
- When it went live
- Any errors or issues encountered
What Logs Include
- Creation Events: Initial action setup and generation
- Modification Events: Changes to instructions, selection criteria, or settings
- Deployment Events: Version changes, approvals, and publishing
- Execution Events: Test runs and their results
- Troubleshooting when actions behave unexpectedly
- Understanding how an action evolved over time
- Tracking who made changes and when
- Compliance and governance requirements
Version Information
At the top right, you’ll see version information showing whether this action is:- Draft: Still being developed and tested
- Submitted for Approval: Awaiting review
- Published: Live and available to users
- Archived: Superseded by a newer version
Action Management Options
The Action Details page provides several management capabilities:- Deployment Rules: Configure how and when this action gets deployed to users
- Edit Action: Modify the name, description, or core functionality
- Test Action: Validate behavior before deploying changes
- View Logs: Access detailed execution and modification history
- Manage Versions: Switch between versions or roll back changes
Next Steps
Now that you understand the Action Details page, you’re ready to:- Learn about different step types and when to use each
- Test your action with various scenarios
- Deploy your action and manage versioning