

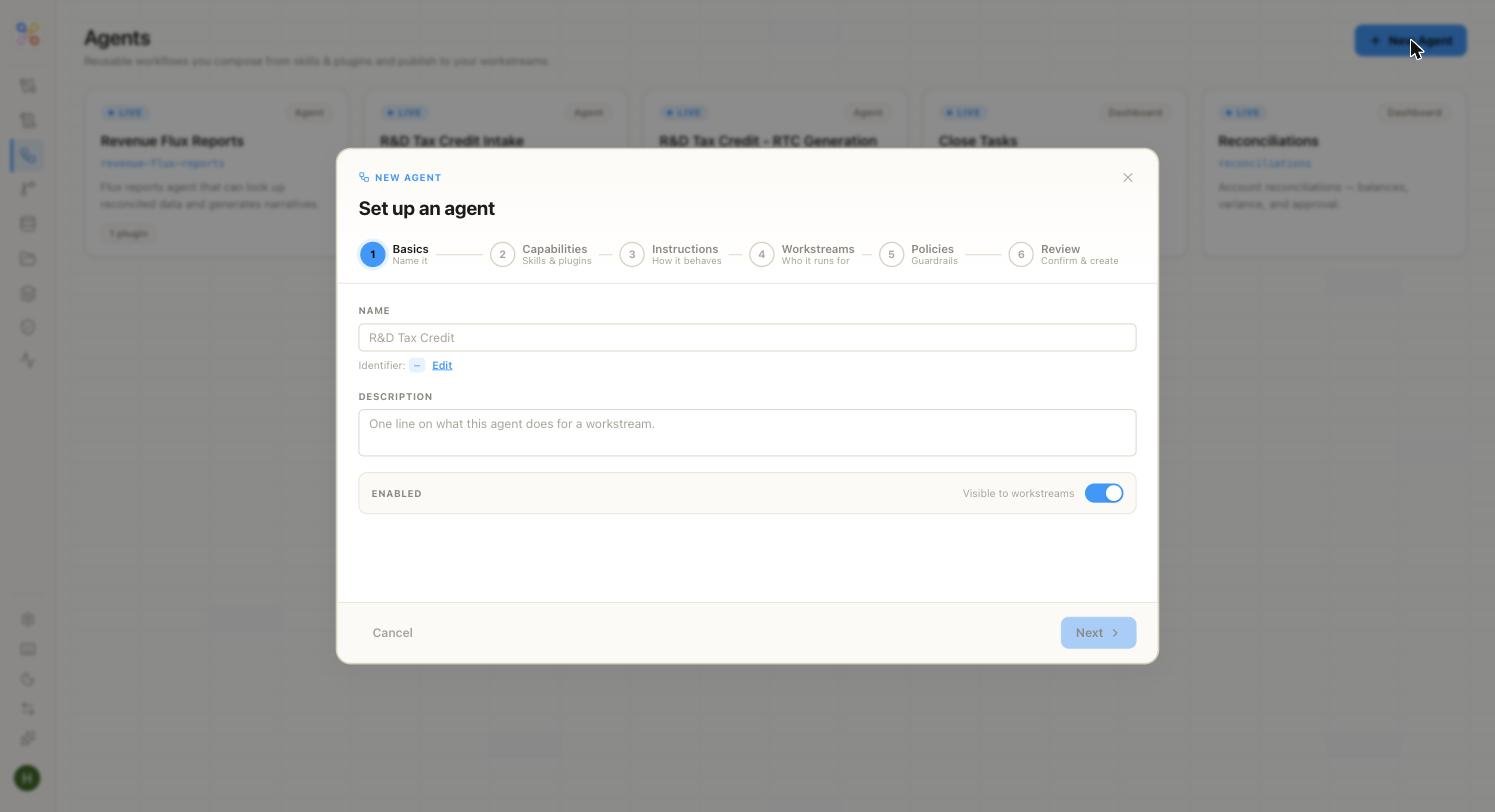
The six-step builder
Creating an agent walks through six steps — the same shape whether you’re starting fresh or refining a template’s agent.1
Basics
Give the agent a name (e.g. “R&D Tax Credit”) and a description of what it does for a workstream. The name generates a fixed identifier (e.g.
r_d_tax_credit) that can’t change after creation, so choose it deliberately. An Enabled toggle controls whether it’s visible to workstreams.2
Capabilities
Pick the skills and plugins this agent may use — Read documents, Query Data Store, Generate workpaper, Web search, Tax Forms, and so on. Turn on only what the work needs; a skill grants capability, not access. See Instructions and skills.
3
Instructions
Write plain-language direction for how the agent should behave and sequence its work — the glue logic. Be specific about the output you want and any standards to follow.
4
Workstreams
Choose which workstreams (clients) this agent runs for. Agents bind to their workstreams here, at build time.
5
Policies
Set the guardrails — the constraints the agent must operate within (for example, where human review is required). This is where review and escalation behaviour is shaped.
6
Review
Confirm the configuration and create the agent.